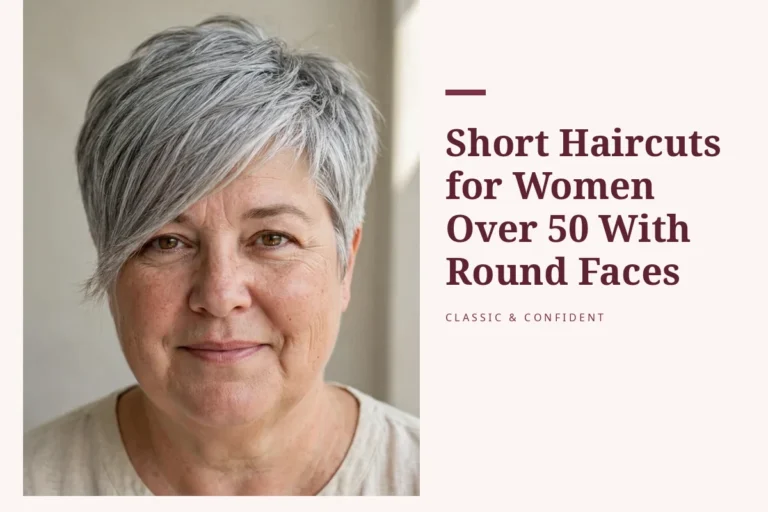
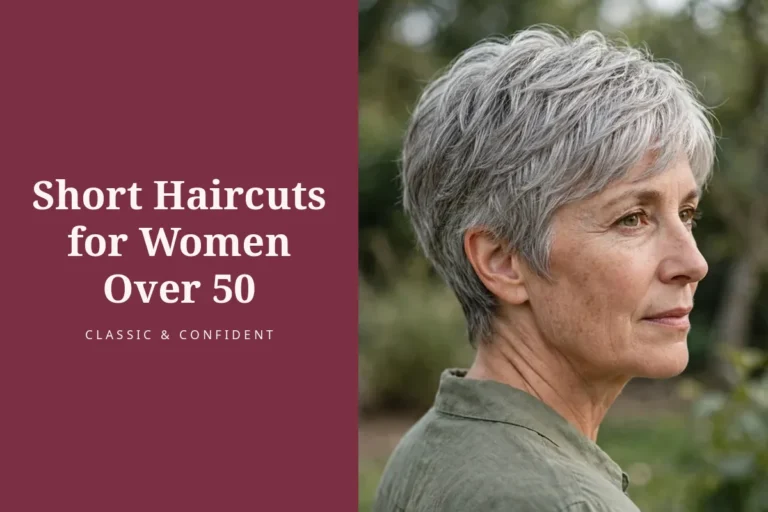
20 Pixie Cuts for Women Over 50
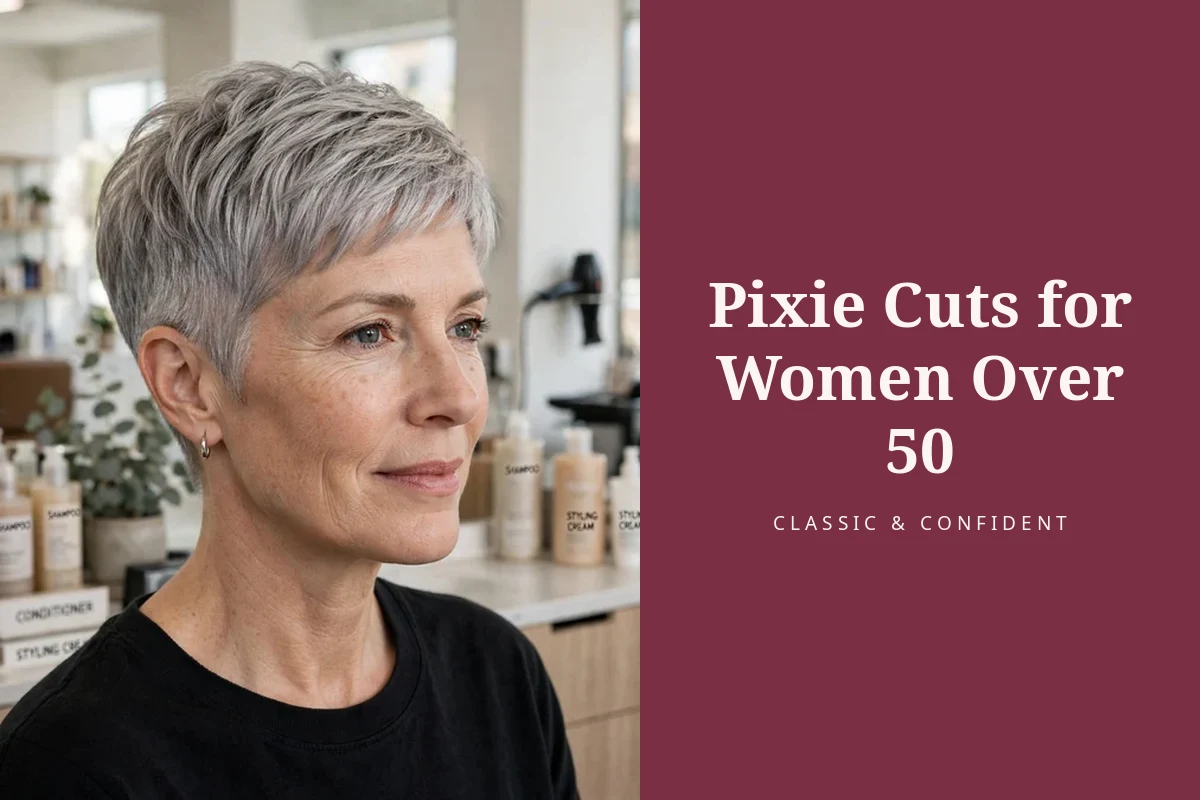
Is 50 too old for a pixie? Not even close. Some of the sharpest pixie hairstyles for older women work precisely because of mature hair — the silver, the finer texture, the softer jawline all give a short cut something to work with. A pixie removes the weight that drags fine hair flat and puts the focus exactly where you want it: cheekbones, eyes, and great earrings.
Below you’ll find 20 distinct pixie cuts, each with the mechanism that makes it flattering, exact lengths and trim schedules, the precise words to say to your stylist, and a numbered styling routine you can do in minutes. Whether you want classic and polished or choppy and bold, there’s a version here cut for your face shape and hair texture.
Quick picks
- First pixie ever? → The classic tapered pixie (#1).
- Fine or thinning hair? → The textured choppy pixie (#3) or layered pixie with volume crown (#14).
- Want to soften forehead lines? → The long pixie with wispy fringe (#2).
- Feeling bold? → The undercut pixie (#5) or the very short crop (#19).
- Lowest maintenance of all? → The side-parted classic pixie (#15).
- Growing out gracefully? → The pixie bob (#7).
Contents
How to choose your pixie
Start with your hair’s texture, not the photo. Fine, straight hair needs point-cutting and layering to create the illusion of fullness — a blunt one-length pixie will lie flat and show scalp. Thick or coarse hair needs the opposite: weight removed from underneath with thinning shears or an undercut, or it will mushroom out into a triangle. Tell your stylist your hair’s real behaviour on day two, not day one.
Match the cut to your face shape, honestly. Round faces gain the most from height on top and asymmetry — a deep side part or an asymmetric pixie adds the vertical line a round face lacks. Long faces do the opposite: width at the sides and a fringe shorten the face visually. If you’re between shapes, the side-swept fringe (#4) is the safest universal flatterer, which is why stylists reach for it first.
Count your styling minutes before you commit. A wash-and-go pixie exists, but only for certain textures — straight, fine hair air-dries into most tapered cuts with a pea-size of cream. Curly and wavy pixies need 5–10 minutes of scrunching and diffusing, and undercuts need a trim every 3–4 weeks to keep the shaved line crisp. Be honest about the 6 a.m. version of you, not the salon version.
Use your fringe as the anti-ageing tool. After 50, the fringe does more lifting than any other part of the cut: a wispy fringe diffuses forehead lines, a side-swept fringe draws the eye diagonally across the face instead of straight down, and a micro fringe shows off strong brows. If you’re browsing short haircuts for women over 50 and can’t decide, start with any pixie that has a fringe — you can always grow it out.
Bring words, not just pictures. Photos help, but the cut lives or dies on the technical instruction. Every point below includes the exact sentence to say to your stylist — use it verbatim. And if your hair is fine or thinning, cross-reference the pixie cuts for fine hair over 50 guide before your appointment so you know which techniques (point-cutting, never blunt; texturising, never thinning shears on fragile hair) to ask for.
At a glance
| Pixie | Top length | Trims | Best for |
|---|---|---|---|
| 1. Classic tapered pixie | 2.5–5 cm | Every 4–5 weeks | First-timers, all face shapes |
| 2. Long pixie, wispy fringe | 4–7 cm | Every 5–6 weeks | Forehead lines, long faces |
| 3. Textured choppy pixie | 3–6 cm | Every 4 weeks | Fine or thin hair |
| 4. Side-swept fringe pixie | 2–4 cm, fringe 7–10 cm | Every 4–5 weeks | Round faces |
| 5. Undercut pixie | 5–8 cm | Every 3–4 weeks | Thick hair, bold dressers |
| 6. Curly pixie | 4–8 cm | Every 6–8 weeks | Natural curls |
| 7. Pixie bob (bixie) | 8–12 cm | Every 5–6 weeks | Growing out, cautious committers |
| 8. Asymmetric pixie | 2 cm / 8–10 cm | Every 4 weeks | Round faces, strong style |
| 9. Sleek polished pixie | 2–4 cm | Every 4 weeks | Straight hair, formal settings |
| 10. Feathered pixie | 4–7 cm | Every 5 weeks | Softening angular features |
| 11. Micro fringe pixie | 2–4 cm | Every 3–4 weeks | Strong brows, oval faces |
| 12. Wavy pixie | 4–7 cm | Every 5–6 weeks | Natural wave |
| 13. Tapered pixie, nape detail | 3–5 cm | Every 4 weeks | Detail lovers |
| 14. Layered pixie, volume crown | 6–9 cm crown | Every 4–5 weeks | Flat fine hair |
| 15. Side-parted classic | 3–5 cm | Every 4–5 weeks | Lowest maintenance |
| 16. Shaggy pixie | 5–9 cm | Every 6 weeks | Lived-in texture lovers |
| 17. Pixie, long sideburns | 3–5 cm | Every 4–5 weeks | Softening a strong jaw |
| 18. Tousled piece-y pixie | 3–6 cm | Every 4 weeks | Modern, undone finish |
| 19. Very short crop | 1–2 cm | Every 3 weeks | Confident minimalists |
| 20. Soft feminine pixie | 4–6 cm | Every 5 weeks | Gentle, rounded silhouette |
The classics that always work
If you’ve never gone this short, start here. These are the cuts stylists have been refining for decades — forgiving on growing-out, flattering on nearly every face, and the easiest to maintain.
1. The Classic Tapered Pixie
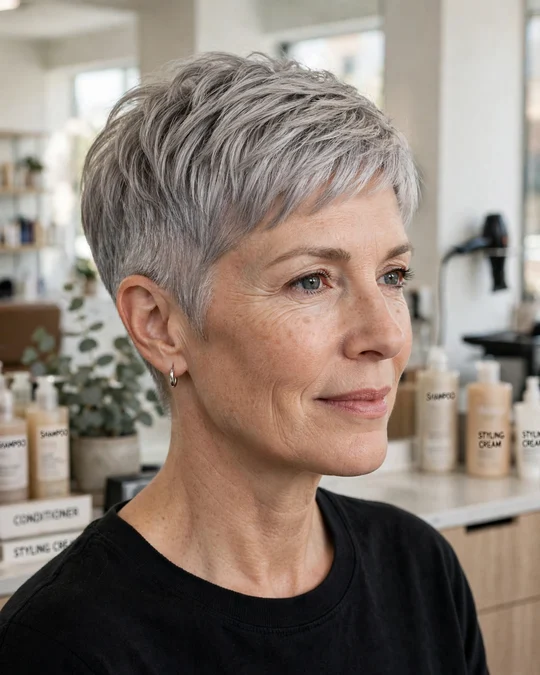
The taper is the whole trick: hair graduates from longer on top (2.5–5 cm) down to a close finish at the nape and around the ears. That gradient pulls the eye upward and inward, which is why a tapered pixie slims a fuller face and gives fine hair the appearance of density — there’s simply no long, thin tail to compare the top against.
It also grows out better than any other pixie here. Because the shape is built on a gradient rather than a hard line, weeks 3 to 5 still look intentional — the cut just gets softer. This is the one stylists recommend when a client says “I’ve never gone this short” and means it.
- Length: 2.5–5 cm on top, tapered to the skin at nape and ears
- Trims: Every 4–5 weeks
- Styling time: 3 minutes
- Face shapes: All — oval, round, square, heart, long
Ask your stylist for: “Taper the nape and sides close at the hairline, keep 5 cm of length through the top and crown, and soften the edges with point-cutting — no hard lines anywhere.”
How to style it:
- Towel-dry until damp, not dripping — about 60% dry.
- Work a pea-size amount of light styling cream through the top with your fingertips, lifting at the roots.
- Blow-dry forward and up with your fingers (no brush) for 2 minutes, then pinch the crown pieces into place.
Skip it if you want drama — this is the quiet, reliable choice, and it won’t scratch a bold-style itch.
Best for: first-time pixie wearers and anyone who wants the lowest-risk short cut in existence.
2. The Sleek Polished Pixie
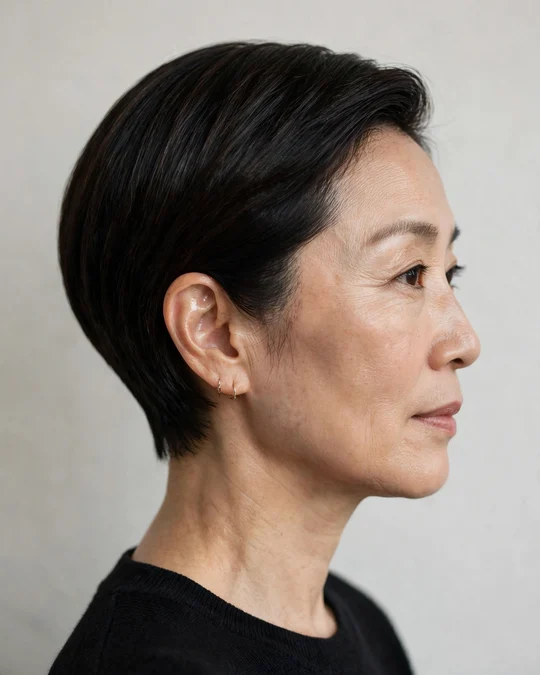
Sleekness is a texture choice with a real payoff: when hair lies smooth and close to the head, light reflects evenly off the surface, which makes colour — especially silver or a rich single-process shade — look expensive and deliberate. The mechanism is simple flatness: a 2–4 cm cut dried smooth has no flyaways to scatter light, so the whole head reads as one glossy shape.
This is also the most boardroom-friendly pixie on the list. It reads as intentional and groomed in a way textured cuts sometimes don’t, which matters if your workplace still raises an eyebrow at “edgy”. Pair it with a strong lip and it does all the talking.
- Length: 2–4 cm all over
- Trims: Every 4 weeks
- Styling time: 5 minutes
- Face shapes: Oval, heart, square — needs balanced proportions
Ask your stylist for: “A close, clean pixie, 3 cm through the top, cut to lie flat — minimal texturising, I want a smooth surface I can polish.”
How to style it:
- Apply a smoothing serum (two pumps) to damp hair, combing it flat to the head in the direction of growth.
- Blow-dry on medium heat with a flat paddle brush, directing everything down and slightly forward — 3 minutes.
- Finish with a pea-size of pomade smoothed over the surface, then a light mist of shine spray held 25 cm away.
- Tuck one side firmly behind the ear for asymmetry that keeps it from looking helmet-like.
Skip it if your hair is very curly or cowlick-prone — fighting natural texture into sleekness every morning is a losing battle.
Best for: straight, fine-to-medium hair and anyone who wants the most elegant version of short.
3. The Side-Parted Classic Pixie

A deep side part does two jobs at once: it creates instant asymmetry, which the eye reads as structure, and it lifts the heavier side into a soft sweep of volume at the crown. On fine hair that falls flat with a centre part, simply moving the part 5–7 cm off-centre can add the visual equivalent of a full styling product — it’s the cheapest volume trick in the book.
Maintenance is the real selling point. There’s no fringe to trim between appointments, no undercut line to keep crisp, and the cut looks correct even at week 6. If you want a pixie that asks nothing of you, this is it.
- Length: 3–5 cm, longer on the heavy side of the part
- Trims: Every 4–5 weeks (forgiving to 6)
- Styling time: 2 minutes
- Face shapes: Round, oval, heart
Ask your stylist for: “A classic pixie with a deep side part — keep the heavy side 1–2 cm longer than the other side so it sweeps, and taper the nape.”
How to style it:
- Find your part while hair is damp — use the arch of your eyebrow as the guide, parting above its highest point.
- Blow-dry the heavy side up and over with your fingers, then let it fall — the sweep sets itself.
Skip it if you have a strong cowlick exactly where the part wants to sit — you’ll fight it daily.
Best for: minimal-effort mornings and fine hair that needs free volume.
4. The Tapered Pixie with Nape Detail
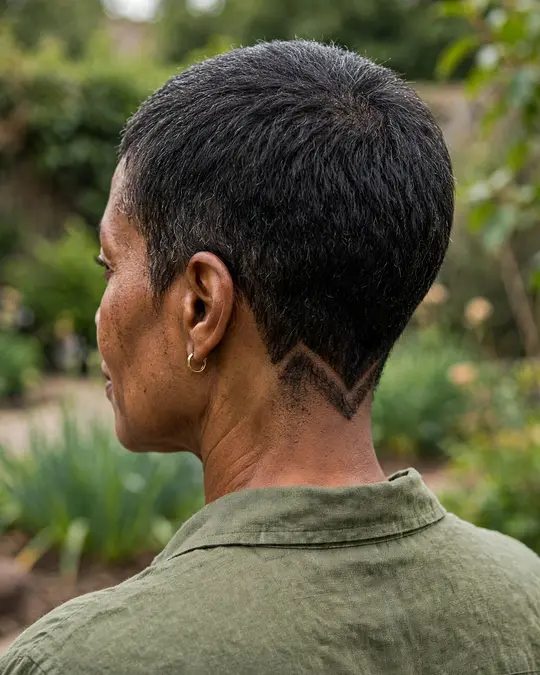
Most pixies treat the nape as an afterthought — this one makes it the signature. A shaped hairline (a soft V, a clean curve, or a sharp squared edge) turns the back view into a deliberate design feature, which matters more than you’d think: colleagues, fellow commuters, and everyone behind you in a queue sees the nape more than the front.
The mechanism is pure geometry. A V-shaped nape draws the eye downward to a point, which lengthens the neck visually — a genuine advantage if you wear a lot of crew necks or scarves. A curved nape does the opposite, softening a long neck. Either way, it signals that the cut was designed, not just shortened.
- Length: 3–5 cm on top, nape shaped to the skin
- Trims: Every 4 weeks (the nape line blurs fast)
- Styling time: 3 minutes
- Face shapes: All — choose V for short necks, curve for long necks
Ask your stylist for: “A tapered pixie, and I want the nape shaped — a soft V if my neck is on the shorter side — cut right down to a clean hairline.”
How to style it:
- Style the top exactly like the classic tapered pixie — cream, lift, finger-dry.
- Between appointments, keep the nape crisp yourself: every 10 days, have someone (or a hand mirror) tidy the hairline with clippers on the shortest guard, following the V or curve your stylist set.
- Wear your hair up-tucked behind the ears when you want the nape detail visible — that’s the whole point of it.
Skip it if you never want to think about the back of your head — this detail needs a tidy-up between cuts.
Best for: detail lovers and anyone whose back view gets a lot of airtime.
5. The Soft Feminine Pixie
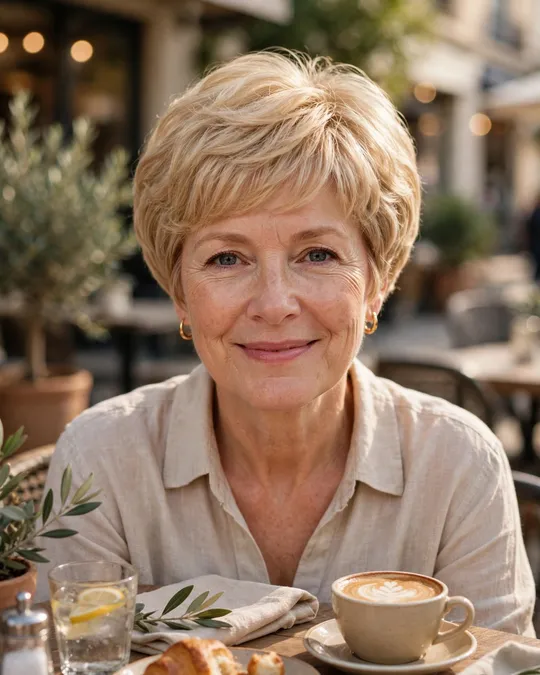
“Feminine” here means rounded, not fussy: soft layers that curve around the head, edges that are diffused rather than sharp, and enough length (4–6 cm) to move. The mechanism is silhouette — a rounded shape echoes the curve of the cheek and jaw instead of contrasting with it, so the whole head reads softer. It’s the pixie for women who want short hair without a single hard line.
This cut is also the most forgiving grow-out on the list alongside the bixie. The layers are already long enough that month two looks like a deliberate bob-in-progress rather than an awkward phase, which makes it the safest choice if you’re pixie-curious but commitment-shy.
- Length: 4–6 cm, softly layered
- Trims: Every 5 weeks
- Styling time: 4 minutes
- Face shapes: Square, heart, long — softens angles
Ask your stylist for: “A soft, rounded pixie — 5 cm through the top with long, diffused layers, no blunt edges, and the perimeter softened so nothing looks sharp.”
How to style it:
- Apply a pea-size of soft-hold cream to damp hair and scrunch gently — you’re encouraging curve, not texture.
- Blow-dry with a small round brush, rolling sections under as you go to reinforce the rounded shape.
Skip it if your hair is very coarse or wiry — soft shapes need pliable hair to hold the curve.
Best for: square or angular faces, and pixie first-timers who fear looking severe.
Texture and movement
These are the cuts for hair that needs waking up. Choppy ends, piece-y separation, and lived-in layers create the illusion of thickness and make styling genuinely fast — texture hides a multitude of sins.
6. The Textured Choppy Pixie

Point-cutting is the engine here: instead of cutting straight across, the stylist snips into the ends at an angle, creating dozens of slightly different lengths. Each uneven end catches light separately, which is exactly why choppy pixie hairstyles for older women with fine hair look thicker — the eye reads all those separated tips as volume that a blunt edge could never fake.
The practical bonus is speed. Texture is self-styling: the cut already has the separation built in, so a 60-second scrunch with paste gives you the finished look. Bedhead is not a failure state with this cut — it’s the brief.
- Length: 3–6 cm, point-cut throughout
- Trims: Every 4 weeks
- Styling time: 2 minutes
- Face shapes: Oval, heart, long — adds width where needed
Ask your stylist for: “A choppy pixie — point-cut the ends aggressively through the top and crown so I get real separation, keep the perimeter soft, 4 cm at the shortest.”
How to style it:
- Rub a pea-size of matte paste between your palms until it disappears.
- Push your fingertips into the roots and shake — don’t smooth, just lift and separate for 60 seconds.
- Pinch 4–5 individual pieces at the crown and pull them slightly forward for definition.
- Leave it. Seriously — overworking kills the texture.
Skip it if you need a polished office look daily — choppy reads casual by design.
Best for: fine or thin hair that needs the illusion of fullness, fast.
7. The Wavy Pixie
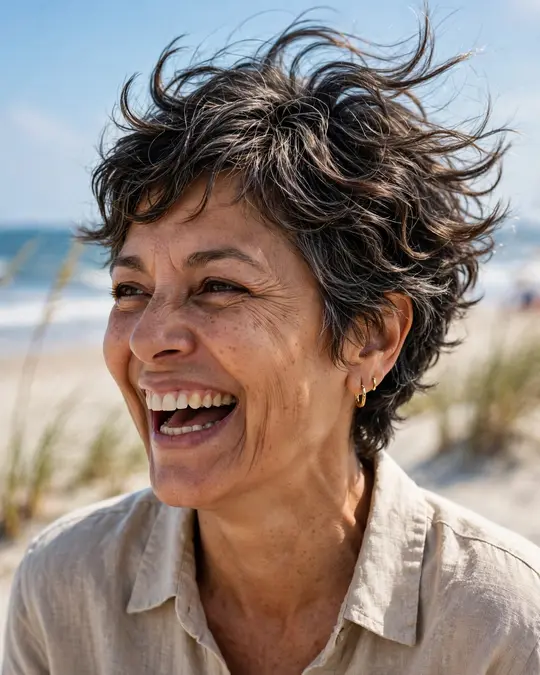
Natural wave is a gift most pixie wearers don’t know they have until the weight comes off. Long hair stretches wave patterns straight; cut to 4–7 cm and the wave springs back, giving you built-in movement that straight-haired women have to manufacture with product. The cut works with the bend instead of against it.
The key technical detail is cutting dry or nearly dry. Wave patterns shift dramatically between wet and dry, and a stylist who cuts your waves dry can see exactly where each bend lands — wet-cutting a wavy pixie is how you end up with one side flipping out and the other tucking in.
- Length: 4–7 cm, cut to follow the wave
- Trims: Every 5–6 weeks
- Styling time: 6 minutes
- Face shapes: All — wave softens every angle
Ask your stylist for: “Cut it dry so you can see my wave pattern — keep 6 cm through the top, carve the shape around the bends, and don’t thin it out, I need the weight.”
How to style it:
- On damp hair, rake a walnut-size of curl cream through from roots to ends.
- Scrunch upward in sections, then diffuse on low heat for 4 minutes — or air-dry if you have the time.
- Once fully dry, break the cast by scrunching again with dry hands; add a drop of oil to the ends only.
Skip it if your “wave” is really just bendy straight hair — without a true wave pattern this falls flat.
Best for: natural wavy texture and wash-and-go routines.
8. The Shaggy Pixie

The shag brings its signature trick to pixie length: disconnected layers of different lengths that create movement in every direction. On a pixie, that means the top can be 8–9 cm while the sides stay close — the contrast between the lengths is what gives the cut its rock-and-roll energy and makes even fine hair look like there’s twice as much of it.
It’s also the most forgiving cut here for in-between stages. Shag layers are meant to look undone, so weeks 5 and 6 just look shaggier — there’s no “overgrown” moment, only “more lived-in”. If salon visits are a chore, this buys you the longest leash.
- Length: 5–9 cm on top, close sides
- Trims: Every 6 weeks
- Styling time: 4 minutes
- Face shapes: Oval, long, heart — the volume suits longer faces
Ask your stylist for: “A shaggy pixie — keep real length on top, 8 cm, with disconnected shag layers, and keep the sides tight so the contrast does the work.”
How to style it:
- Work texturising spray through damp hair, roots to ends.
- Rough-dry upside down for 3 minutes — the messier the better.
Skip it if you prefer neat and controlled — shag is philosophically opposed to neat.
Best for: texture lovers and anyone who stretches time between salon visits.
9. The Tousled Piece-y Pixie
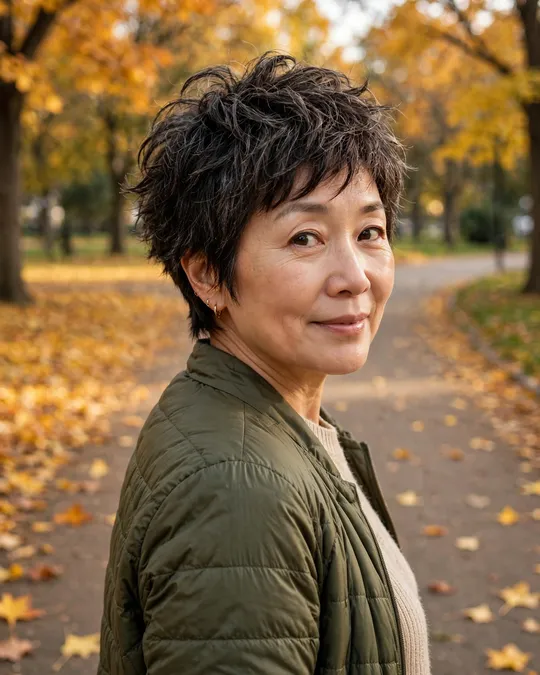
Piece-y separation is a deliberate styling choice, not a cutting one: the cut is a standard 3–6 cm pixie, but the finish separates hair into defined ribbons instead of a unified mass. Those visible separations create shadow lines across the head, and shadow reads as depth — the same reason a piece-y pixie photographs so well. It’s optical fullness, engineered.
The catch is product discipline. Piece-y needs exactly the right amount of wax or paste — too little and the pieces collapse, too much and it looks greasy by noon. Start with half what you think you need; you can always add.
- Length: 3–6 cm
- Trims: Every 4 weeks
- Styling time: 5 minutes
- Face shapes: Oval, square, heart
Ask your stylist for: “A pixie I can wear piece-y — point-cut the top so the ends separate easily, 5 cm through the crown.”
How to style it:
- Blow-dry roughly with fingers until fully dry — no brush, no direction.
- Warm half a pea-size of fibre wax between your palms.
- Pinch and twist small sections through the top and fringe, pulling each piece slightly outward.
- Step back and check the silhouette in the mirror — add one more tiny piece at the crown if it looks flat.
Skip it if your hair is very fine and silky — pieces need enough grip to hold their separation.
Best for: medium-textured hair and a modern, undone finish.
10. The Layered Pixie with Volume Crown
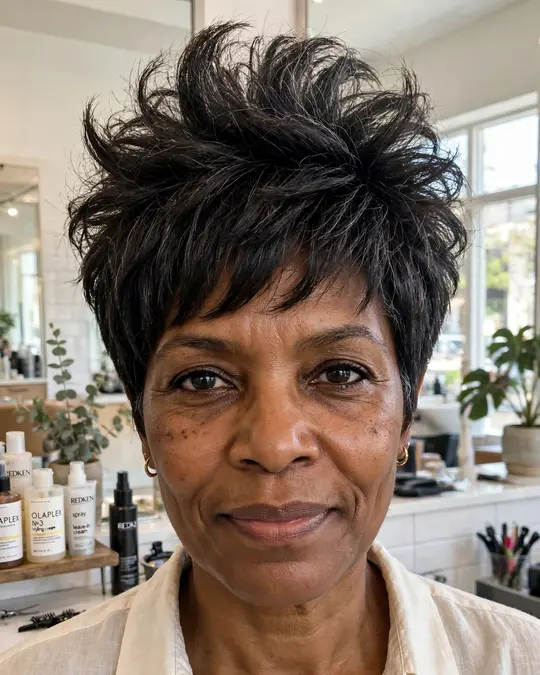
Flat crown is the number one complaint about pixies on fine hair, and stacked layering is the fix. By cutting the crown layers 6–9 cm while keeping everything beneath shorter, each layer sits on top of the one below — the hair literally holds itself up. It’s architecture, not product: the volume exists in the cut before you touch a dryer.
This is the cut to ask for if your hair “just lies there”. Women with fine, straight hair that refuses to hold a style get the most dramatic before-and-after from this one, because the lift is structural and survives humidity, hats, and naps.
- Length: 6–9 cm at the crown, shorter beneath
- Trims: Every 4–5 weeks
- Styling time: 4 minutes
- Face shapes: Round, oval — crown height elongates
Ask your stylist for: “Stack the layers at the crown — keep 8 cm up top so the layers build on each other, and take the sides and back shorter for contrast.”
How to style it:
- Apply volumising mousse (a golf-ball amount) to damp roots at the crown only.
- Blow-dry the crown sections upward with a small round brush, over-directing each section forward.
- Let it cool for 60 seconds before touching — the lift sets as it cools, not while it’s hot.
Skip it if your hair is thick and coarse — stacked layers on dense hair create a shelf, not lift.
Best for: fine, flat hair that needs structural volume.
Fringe-forward pixies
The fringe is the hardest-working part of any pixie after 50. These five cuts lead with it — wispy, side-swept, micro, or extra-long — to soften foreheads, frame eyes, and add instant style.
11. The Long Pixie with Wispy Fringe
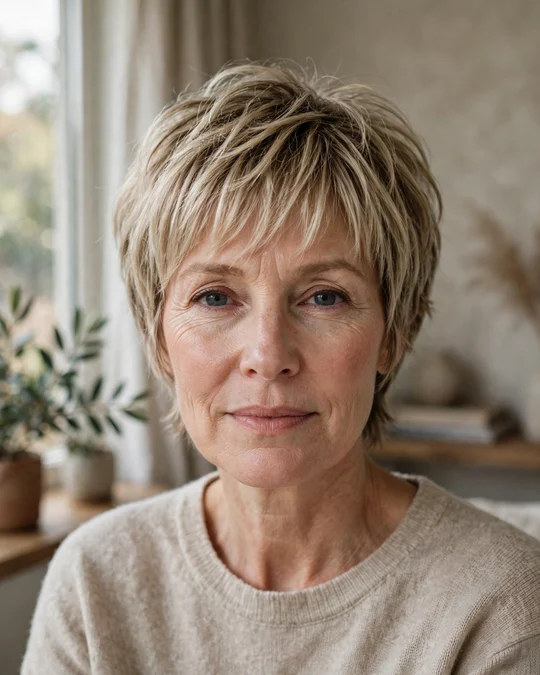
A wispy fringe is translucent by design — cut with point-cutting so it falls in soft, separated strands rather than a solid curtain. That translucency is the anti-ageing mechanism: instead of a hard horizontal line across the forehead (which emphasises lines), you get a diffused veil that softens everything behind it while still showing skin through. Forehead lines don’t disappear; they just stop being the first thing anyone sees.
Length matters here: the pixie body stays 4–7 cm, but the fringe reaches the brow or just past it. That extra 2–3 cm is what separates this from a standard pixie — it gives you styling options (sweep it, part it, pin it) that shorter fringes don’t allow.
- Length: 4–7 cm; fringe to the brow
- Trims: Every 5–6 weeks (fringe tidy at 3)
- Styling time: 4 minutes
- Face shapes: Long, oval, heart — shortens visually
Ask your stylist for: “A long pixie with a wispy, point-cut fringe to the brow — I want it translucent, not heavy, so take the weight out of the fringe.”
How to style it:
- Blow-dry the fringe first, before the rest — it sets fastest and dictates the look. Direct it down and slightly to one side.
- Style the crown with lift (fingers, upward), keeping the fringe itself soft and forward.
Skip it if your hairline is very low or you have a strong widow’s peak that fights a straight fringe.
Best for: softening forehead lines and balancing long faces.
12. The Pixie with Side-Swept Fringe
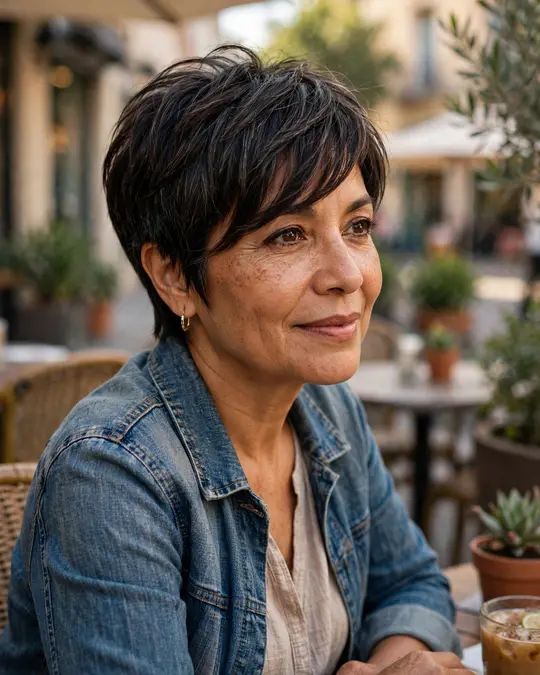
The side-swept fringe is the most universally flattering fringe in existence, and the reason is pure geometry: a diagonal line across the forehead breaks the face’s symmetry, and the eye follows the diagonal — up and across — instead of dropping straight down. On round faces that diagonal is transformative; it creates the angles the face doesn’t naturally have.
At 7–10 cm, this fringe is long enough to tuck behind the ear on days you want it gone, which makes it the most versatile fringe here. It also hides a multitude of grow-out sins — an overgrown side-swept fringe just becomes a longer sweep, never an awkward stage.
- Length: 2–4 cm body; fringe 7–10 cm
- Trims: Every 4–5 weeks
- Styling time: 3 minutes
- Face shapes: Round especially; flatters all
Ask your stylist for: “Keep the fringe long — 8 cm — swept from a deep side part, and cut it on a diagonal so it blends into the side, not a blunt edge.”
How to style it:
- Part deeply on damp hair, above the outer corner of your best eyebrow.
- Blow-dry the fringe across the forehead in the sweep direction, finishing with the dryer pointing down the hair shaft for smoothness.
- Press it into place with a flat brush and a cool shot — the cool air locks the direction.
Skip it if you wear glasses with heavy frames — long fringe plus bold frames crowds the eye area.
Best for: round faces and anyone who wants the safest fringe in the book.
13. The Pixie with Micro Fringe
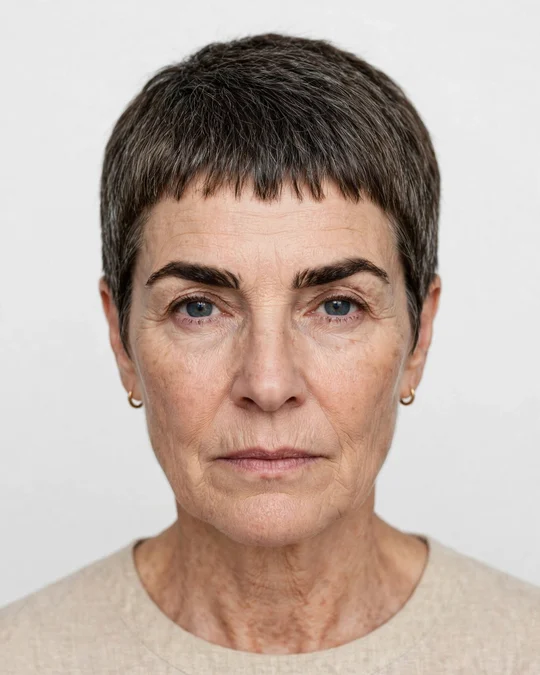
A micro fringe — 2–3 cm, sitting well above the brow — does the opposite of what you’d expect: instead of hiding the forehead, it frames it, and in doing so it puts your eyes and brows centre stage. The mechanism is exposure. By revealing more of the face, a micro fringe makes strong features (great brows, good cheekbones) the focal point, which is why it looks so striking on women over 50 who’ve kept their brow game strong.
It’s also the highest-maintenance fringe here. At that length, two weeks of growth changes the whole look, so this cut commits you to a fringe tidy every 3 weeks — or learning to trim it yourself between appointments (straight across, tiny snips, dry hair, and less than you think).
- Length: 2–4 cm; fringe 2–3 cm above the brow
- Trims: Every 3–4 weeks (fringe tidy at 3)
- Styling time: 3 minutes
- Face shapes: Oval, heart — needs a balanced forehead
Ask your stylist for: “A micro fringe — cut it 3 cm above my brow line, textured at the ends so it’s not a ruler-straight line, and keep the sides tight.”
How to style it:
- Blow-dry the fringe straight down with a small brush — no direction, just flat.
- Style the rest with texture (paste, piece-y) for contrast: neat fringe, undone crown.
Skip it if your forehead is very long or lined — a micro fringe exposes rather than softens.
Best for: oval faces, strong brows, and confident minimalists.
Good to know
Fringe trims between full appointments are usually free or under $15 at most salons — and they take 5 minutes. If you’re choosing any pixie with a fringe (points 11–13), book the fringe tidy when you book the cut, every 3 weeks, and you’ll never have that overgrown-fringe week. It’s the cheapest maintenance habit in short hair.
14. The Pixie Bob (Bixie)

The bixie lives in the sweet spot between a pixie and a bob: short at the nape (3 cm), long on top (8–12 cm), with enough length to tuck, pin, or sweep. The mechanism is optionality — it’s the only cut here that gives you two genuinely different looks (piece-y and forward for edge, tucked and smooth for polish) from the same appointment.
It’s also the smartest grow-out vehicle ever designed. If you’re growing a pixie into a bob, the bixie isn’t a phase — it’s the destination for 3–4 months, and it looks deliberate the entire time. Many women arrive at the bixie by accident and stay by choice.
- Length: 3 cm nape; 8–12 cm top
- Trims: Every 5–6 weeks
- Styling time: 6 minutes
- Face shapes: All — the length is universally forgiving
Ask your stylist for: “A bixie — pixie-short at the nape and sides, but keep 10 cm of length on top with long layers so I can wear it textured or tucked.”
How to style it:
- For the textured version: mousse on damp hair, rough-dry, finish with paste on the ends.
- For the polished version: smoothing cream, blow-dry with a round brush turning ends under, tuck one side behind the ear.
- Pin the fringe back with two crossed bobby pins on gym days — the length makes it possible, which a true pixie can’t do.
Skip it if you want the full commitment of short — the bixie is a hedge, and hedges don’t satisfy the bold.
Best for: cautious committers and anyone growing out a pixie gracefully.
15. The Pixie with Long Sideburns
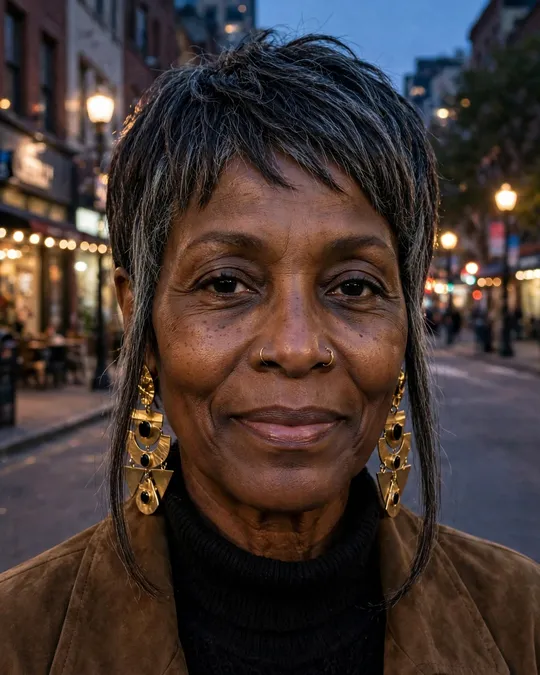
Sideburns — 4–5 cm of length left in front of the ears while everything else stays short — act as vertical curtains that narrow the lower face. The mechanism is framing: two slim columns of hair draw the eye downward in straight lines, which visually slims a wide jaw and softens a square one. It’s contouring, but with hair.
This detail also buys you earring versatility. Long sideburns frame statement earrings beautifully — the hair sits just behind the earring, creating a backdrop that makes the jewellery pop. Short pixies can swallow earrings; this one showcases them.
- Length: 3–5 cm; sideburns 4–5 cm
- Trims: Every 4–5 weeks
- Styling time: 3 minutes
- Face shapes: Square, round — narrows the jaw
Ask your stylist for: “Leave the sideburns long — 4 cm in front of the ears — while you taper everything else close. I want that framing effect on my jawline.”
How to style it:
- Style the crown with lift as usual.
- Smooth the sideburns flat against the face with a dab of pomade — they should lie like curtains, not flip out.
Skip it if your ears stick out — long sideburns draw attention to the ear area.
Best for: square or strong jawlines, and earring lovers.
Bold and edgy
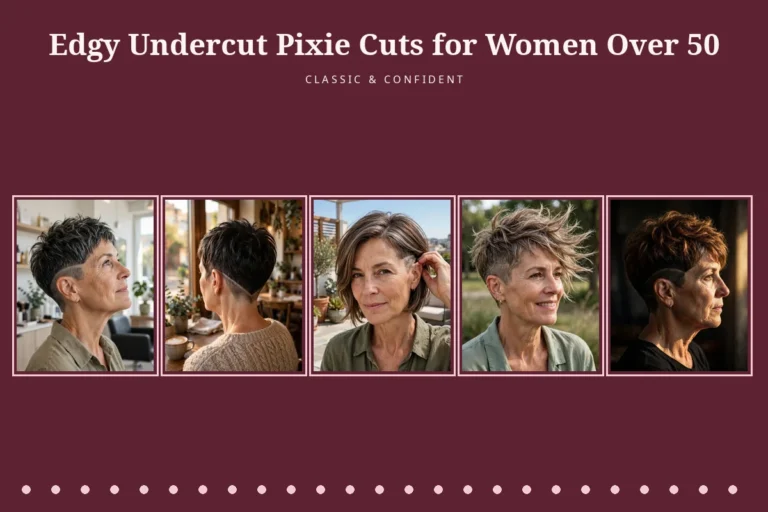
For the woman who wants her haircut to say something. Undercuts, asymmetry, and fearless crops — every one of these is a statement, and every one is backed by technique that keeps it flattering, not just loud.
16. The Undercut Pixie
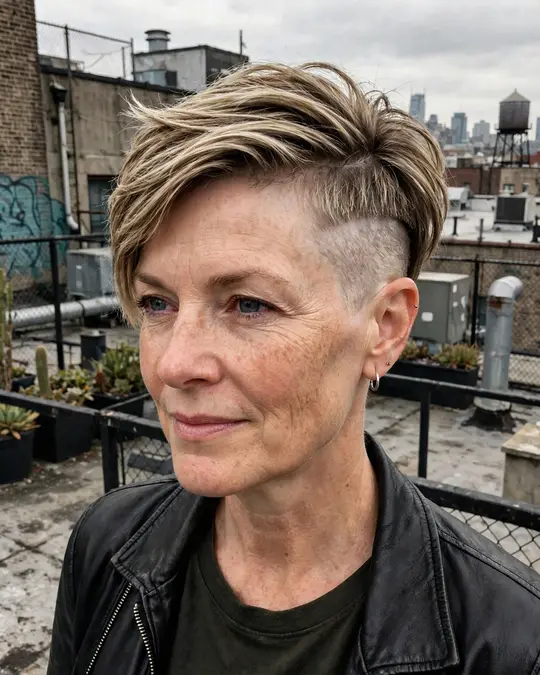
An undercut disconnects the cut into two zones: the underneath (sides and nape) clippered short with a #2–#3 guard, and the top left long at 5–8 cm to fall over it. The contrast is the mechanism — removing the bulk underneath means thick hair stops poufing outward, while the long top keeps the femininity. It’s the only pixie here that actively solves thick-hair problems instead of just accommodating them.
The hidden version is worth knowing about: keep the undercut only at the nape, hidden under the top layer. From the front it reads as a classic pixie; from the back it’s a surprise. It’s the undercut for women who want the edge without announcing it in every meeting.
- Length: 5–8 cm top; #2–3 guard underneath
- Trims: Every 3–4 weeks (the undercut line blurs fast)
- Styling time: 4 minutes
- Face shapes: Oval, heart, square — the contrast suits strong features
Ask your stylist for: “Disconnect the undercut — clipper the sides and nape with a #2 guard right up to the disconnect line, and leave 7 cm on top to fall over it. I want a visible line, not a blend.”
How to style it:
- Blow-dry the top with lift at the roots — the undercut needs no styling at all.
- Sweep the top to one side for maximum contrast between the long top and the clippered side.
- Optional: have the disconnect line sharpened with a razor at the salon every other visit for extra definition.
Skip it if your hair is fine and sparse — an undercut on thin hair removes hair you can’t spare.
Best for: thick, heavy hair and bold personal style.
17. The Curly Pixie
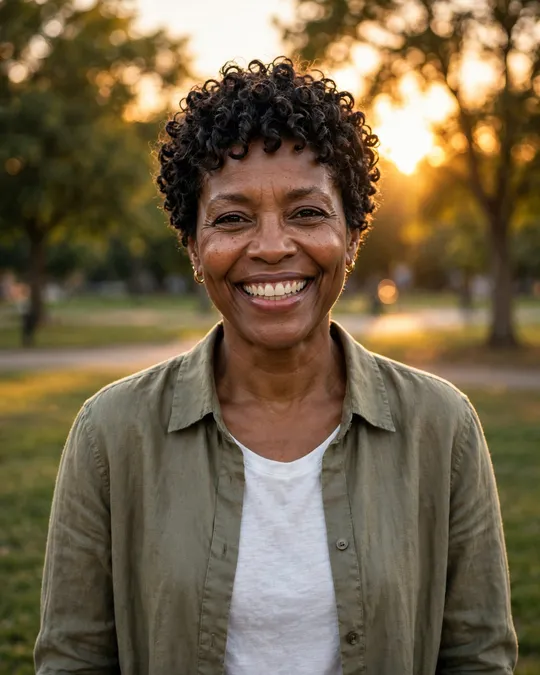
Curls and pixies were made for each other: at 4–8 cm, each curl is short enough to spring up instead of hanging down, which means the cut creates its own volume. The mechanism is curl physics — shorter lengths let the curl pattern tighten, and tightened curls stack on each other, building height at the crown with zero effort. It’s the lowest-effort volume on this entire list.
The critical rule is never to thin curly hair with thinning shears. Thinning shears create short, frizzy pieces inside the curl that explode in humidity. A curly pixie should be shaped curl by curl — dry, one curl at a time — so the stylist can see exactly how each one falls.
- Length: 4–8 cm, shaped curl by curl
- Trims: Every 6–8 weeks
- Styling time: 8 minutes
- Face shapes: All — curls soften everything
Ask your stylist for: “Shape it dry, curl by curl — keep 6 cm through the top, taper the sides to follow my head shape, and no thinning shears anywhere near my curls.”
How to style it:
- On soaking-wet hair, rake leave-in conditioner through, then a golf-ball of curl-defining gel.
- Scrunch upward with a microfibre towel — never a regular towel, which roughs the cuticle.
- Diffuse on medium heat, hovering at the roots first for lift, then scrunching the lengths — 6 minutes.
- Once 100% dry, fluff the roots with your fingertips. Sleep on a satin pillowcase to preserve it for day two.
Skip it if your curls are very tight coils that shrink more than 60% — the cut will read much shorter dry than it looks wet.
Best for: natural curls of any pattern, and wash-and-go volume.
18. The Asymmetric Pixie
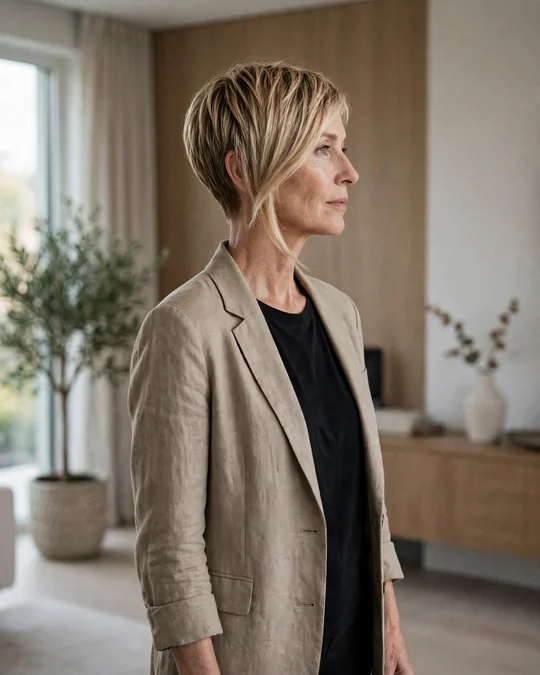
Asymmetry is a face-slimming tool disguised as a fashion statement. With one side cut to 2 cm and the other left at 8–10 cm, the longer side creates a strong diagonal from temple to jaw — and diagonals are the enemy of roundness. The eye travels along the long side instead of across the face’s width, which is why this cut photographs slimmer than any symmetric pixie.
It also has the highest style-per-effort ratio here. The asymmetry does all the visual work, so the styling itself is minimal — the cut looks intentional even when you do almost nothing to it.
- Length: 2 cm short side; 8–10 cm long side
- Trims: Every 4 weeks (asymmetry blurs quickly)
- Styling time: 4 minutes
- Face shapes: Round, oval — the diagonal slims
Ask your stylist for: “A true asymmetric pixie — take one side down to 2 cm, keep the other side 9 cm sweeping across, and make the difference dramatic, not subtle.”
How to style it:
- Blow-dry the long side across the forehead toward the short side, using a flat brush for smoothness.
- Tuck the short side tightly behind the ear to emphasise the contrast.
Skip it if you part your hair in the middle out of habit — this cut needs its deep side part to work.
Best for: round faces and women who want maximum impact per styling minute.
19. The Feathered Pixie
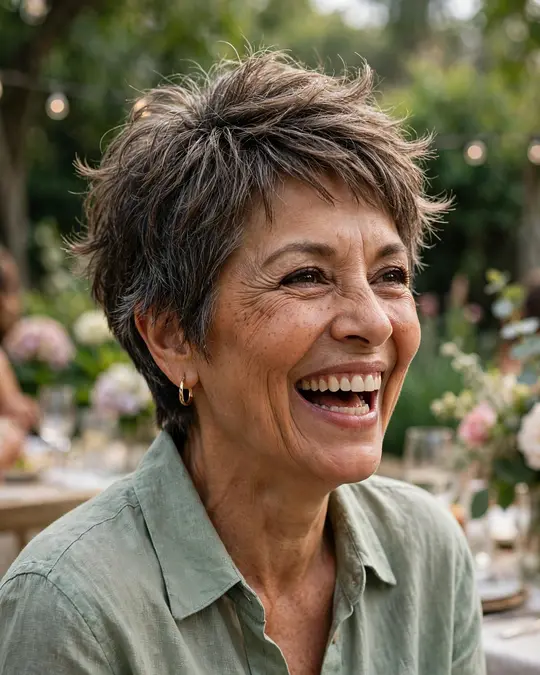
Feathering is a razor technique: instead of cutting ends straight, the razor tapers each strand to a fine point, so the hair flicks outward in soft, airy layers. The mechanism is weightlessness — feathered ends have almost no blunt weight, which means the cut moves when you move. On stiff or heavy hair, it’s the difference between a cut that sits like a cap and one that breathes.
This is also the kindest pixie for angular features. The outward flick at the ends creates softness around the jaw and temples — where a blunt pixie would emphasise squareness, feathering diffuses it.
- Length: 4–7 cm, razor-feathered
- Trims: Every 5 weeks
- Styling time: 5 minutes
- Face shapes: Square, oblong — softens angles
Ask your stylist for: “Feather it with a razor — 6 cm through the top, flicked-out layers at the sides, and keep it airy, not blunt, at the perimeter.”
How to style it:
- Apply light mousse to damp hair — feathered cuts need hold without weight.
- Blow-dry with a round brush, flicking the ends outward as you go — that’s the signature move.
- Finish with a flexible-hold spray; crunch the ends upward once for extra air.
Skip it if your hair is very fine and fragile — razors can fray delicate ends.
Best for: medium-to-thick hair and softening strong jawlines.
20. The Very Short Crop

At 1–2 cm all over, there’s nowhere to hide — and that’s the point. The mechanism is total exposure: with hair this short, the head’s shape, the eyes, the cheekbones and the earrings become the entire look. Women who wear it well describe it as the most liberating cut of their lives, because the morning routine collapses to nearly nothing and the confidence comes from the boldness itself.
Be clear-eyed about the commitment: at this length the cut’s shape is entirely in the clipper work, so it needs a tidy every 3 weeks, and growing it out means passing through every other pixie on this list (which, honestly, is a rather good tour). Try it once — hair grows, but the knowledge that you can pull it off stays.
- Length: 1–2 cm all over
- Trims: Every 3 weeks
- Styling time: 1 minute
- Face shapes: Oval, heart — needs balanced features
Ask your stylist for: “A clipper crop — #2 guard on the sides and back, scissor-cut 2 cm on top, and clean up the hairline so the shape is sharp.”
How to style it:
- Towel-dry, rub in a pea-size of matte paste, done. That’s the whole routine.
- Let your earrings and brows do the styling — this cut is a frame, not the picture.
Skip it if you’re not ready for the grow-out journey — or if you dislike frequent salon visits.
Best for: confident minimalists and anyone done with hair fuss forever.
Pixie upkeep: keeping it sharp
A pixie is low-effort daily and high-commitment monthly — that’s the trade. Here’s how to keep yours looking like week one, not week six.
- Book the next trim before you leave the salon. Four weeks passes fast; a standing appointment means you never hit the shaggy phase.
- Wash less than you think. Most pixies look better on day two — natural oils give the grip that freshly washed hair lacks. Dry shampoo at the roots extends it to day three.
- Use less product than the bottle suggests. Pea-size is literal on short hair; over-producting is the number one cause of flat, greasy pixies.
- Protect the shape at night. A satin pillowcase prevents the friction that flattens one side — a £10 fix for lopsided mornings.
- Refresh colour on schedule. Roots show faster on short hair because there’s no length to distract. Silver growers: a purple shampoo once a week keeps the tone bright.
- Learn one 60-second rescue. Dampen the problem area, add a dab of paste, and re-dry just that section — faster than restyling the whole head.
Your 5-minute morning routine:
- Dampen with a spray bottle if it’s a day-two head; towel-dry if freshly washed.
- Work a pea-size of your usual product through — cream for smooth cuts, paste for textured ones.
- Blow-dry 2–3 minutes in the cut’s natural direction (forward for most pixies, up at the crown).
- Pinch or tuck the defining detail — the fringe, the sweep, the part.
- Step back, check the silhouette, and walk out the door.
The bottom line
If I had to pick one, it would be the textured choppy pixie (#6). It’s the rare cut that flatters fine hair, needs two minutes, forgives a missed trim, and still looks current — the best ratio of payoff to effort on this entire list.
Whichever pixie calls to you, save this guide to your “hair ideas” Pinterest board before your appointment — having all 20 cuts, the exact stylist wording, and the trim schedules in one place makes the consultation ten times easier.
Frequently asked questions
Which pixie hairstyles for older women work best on fine, thinning hair?
The textured choppy pixie (#6) and the layered pixie with volume crown (#10) are the two strongest choices. Both create fullness mechanically — choppy ends through separation, the crown through stacked layering — rather than relying on product. If your hair is fine but you have a lot of it, the feathered pixie (#19) also works; if it’s fine and sparse, avoid the undercut (#16) and the very short crop (#20), which remove hair you can’t spare.
Will a pixie make my round face look rounder?
Only if you choose a symmetric, flat one. A pixie with height on top and asymmetry — the asymmetric pixie (#18), the side-swept fringe (#12), or the layered crown (#10) — does the opposite: the vertical line and diagonal draw the eye up and across, which slims. The cuts to be cautious with on round faces are the sleek polished pixie (#2) worn flat and the very short crop (#20), both of which echo the face’s roundness instead of countering it.
How often does a pixie really need trimming?
Every 3–6 weeks depending on the cut — the at-a-glance table above gives each one’s exact schedule. The rule of thumb: the shorter and more precise the cut, the faster it loses its shape. Undercuts and crops need 3–4 weeks; longer, textured pixies stretch to 6. If salon visits are a burden, choose the shaggy pixie (#8) or the bixie (#14) — both are designed to look good overgrown.
Can I get a pixie if I wear glasses?
Absolutely — but coordinate the fringe with your frames. A long side-swept fringe plus bold frames crowds the eye area, so glasses wearers do better with shorter fringes (the micro fringe #13 is ideal) or no fringe at all (the classic tapered #1). Also consider frame colour against your hair: dark frames on silver hair create a striking contrast that a pixie shows off beautifully.
What should I say to my stylist if I’ve never had short hair?
Use the verbatim line under your chosen cut — but also say this: “I’ve never gone this short, so please cut it a touch longer than the photo first; we can take more off, we can’t put it back.” A good stylist will stage the cut in two passes. And ask them to show you the styling routine in the mirror before you leave — a 2-minute demo is worth more than any product they might sell you.
Will a pixie work with my curly hair, or will it turn into a triangle?
It works — the triangle happens when curly hair is cut blunt at one length, which is exactly what the curly pixie (#17) avoids by shaping curl by curl and tapering the sides. The non-negotiables: cut dry, never thin with thinning shears, and keep enough length on top (6 cm minimum) so the curls have room to form. If your stylist reaches for thinning shears on your curls, that’s your cue to find a curl specialist.
How do I grow out a pixie without the awkward phase?
Grow it through the bixie (#14). Keep trimming just the nape and sides every 6 weeks while letting the top grow — the cut morphs from pixie to bixie to bob with no mullet stage. The shaggy pixie (#8) is the other good grow-out vehicle since its layers are already designed to look undone. Avoid growing out an undercut without a plan: the clippered sections need 3–4 months to catch up, so ask your stylist for a “grow-out shaping” appointment at month two.