
20 Curly Bobs for Women Over 50
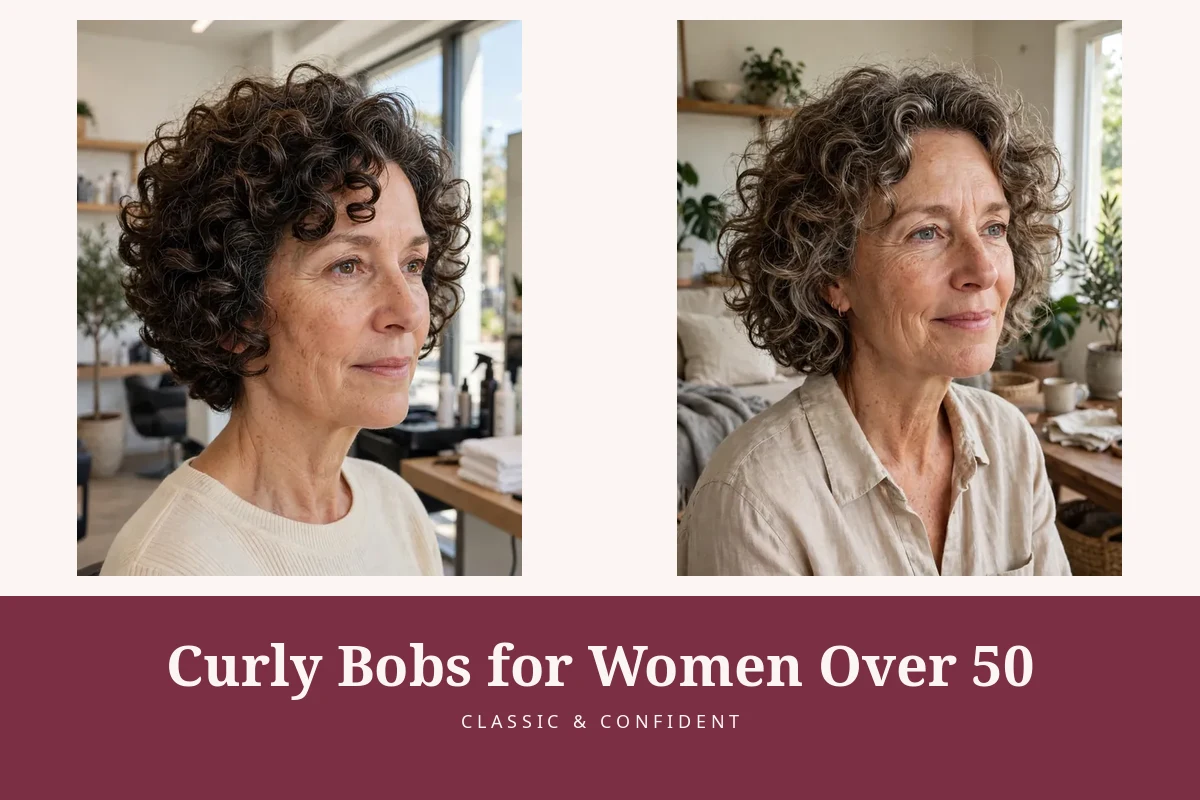
There is no single haircut called a curly bob — there are twenty of them, and the wrong one is chosen the moment the scissors ignore the curl. Curly bobs for older women only work when the cut is designed around the curl type first: where your curls live, how far they spring back when dry, and how much weight each curl needs to fall properly. Get that right and the bob practically styles itself; get it wrong and no amount of product will save it.
This guide gives you twenty curly bobs organised by shape, and every one states honestly which curl type it suits — loose waves, classic curls or tight coils — because a cut that flatters one can swamp another. Each style is cut on dry hair, and each entry includes the shrinkage maths, the trim interval and the exact words to say to your stylist, so you can ask for it by name and know exactly what will happen when it dries.
Quick picks
- Shrinkage-proof and classic → Classic chin-length curly bob (#6).
- Maximum lift, minimum length → Stacked curly bob (#1).
- A safe first curly bob → Curly lob to the collarbone (#11).
- Coils cut one by one → Tight-coil bob, shaped close (#14).
- Grey curls, glossy → Silver curly bob (#15).
- Wash, scrunch, go → Diffused curly bob, air-dry first (#20).
Contents
How to choose a curly bob for your curl type
Know your curl type honestly. Loose waves form soft S-bends that start mid-shaft; classic curls make defined spirals from root to tip; tight coils spring into zigzags and shrink dramatically. Hold a single shed hair next to a ruler, stretch it, let it spring back, and measure both — that ratio decides everything below. If your curls are fine as well as curly, the density tricks in our bob guide for fine hair over 50 pair well with what follows.
Cut dry, always — this is the shrinkage maths. Loose waves shrink 5–10% from wet to dry, classic curls 15–25%, and tight coils 40–60%. That means a coil cut at 25 cm wet lands at 10–15 cm dry — an entire haircut’s worth of difference. A stylist who reaches for the spray bottle and stretches your curls straight before cutting is guessing; one who cuts each curl in its dry, sprung state is measuring. If you are considering going shorter still, the same dry-cutting rule governs the short curly cuts we cover separately.
Triangle avoidance is about where the weight sits. The dreaded triangle — flat at the crown, wide at the jaw — happens when the ends carry more weight than the top. The fix is mechanical: layers that begin at the cheekbone or higher, never a one-length perimeter on dense curls, and the shortest layers where you want lift (usually the crown and back). Readers in their 60s who want the anti-triangle shape with a little more polish should also look at our bobs for women over 60 with fine or thin hair, which tackles the same physics from the density angle.
Diffusing vs air-drying: the cut must survive both. Diffusing buys volume and speed (10–15 minutes); air-drying buys definition and costs time (1–2 hours). A good curly bob looks intentional either way because the shape is cut into the curl pattern, not styled into it. Test any candidate cut with this question: if I had to leave the house with it air-dried and untouched, would the silhouette still hold? If the answer is no, the cut is a styling routine wearing a haircut costume.
At a glance
| Style | Curl type | Trims | Best for |
|---|---|---|---|
| 1. Stacked curly bob | Classic curls | 8–10 weeks | Lift at the crown |
| 2. Short curly bob above the jaw | Classic curls | 6–8 weeks | Maximum spring |
| 3. Rounded curly bob | Loose to medium curls | 8–10 weeks | Even, halo volume |
| 4. Curly pixie bob (bixie) | Tight coils | 5–7 weeks | Shortest bob length |
| 5. Asymmetric curly bob | Classic curls | 8–10 weeks | Slimming round faces |
| 6. Classic chin-length curly bob | Classic curls | 8–10 weeks | The safest all-rounder |
| 7. Curly bob with a blunt base | Loose waves to medium curls | 8–10 weeks | Thicker-looking ends |
| 8. Layered curly bob for volume | Classic curls, finer density | 8–10 weeks | Flat-at-the-crown hair |
| 9. Curly A-line bob | Classic curls | 8–10 weeks | Elongating the neck |
| 10. Shaggy curly bob | Loose waves | 10–12 weeks | Movement and texture |
| 11. Curly lob to the collarbone | Classic curls | 10–12 weeks | First-time bobbers |
| 12. Grown-out curly bob | Classic curls | 12–14 weeks | Low-salon-commitment |
| 13. Wavy bob for loose curls | Loose waves | 8–10 weeks | Barely-curly hair |
| 14. Tight-coil bob, shaped close | Tight coils | 6–8 weeks | Precision on coils |
| 15. Silver curly bob | Medium curls, grey | 8–10 weeks | Grey curls with gloss |
| 16. Curly bob with a curly fringe | Classic curls | 6–8 weeks | Softening a long forehead |
| 17. Curly bob with curtain bangs | Loose to medium curls | 8–10 weeks | Gentle face framing |
| 18. Curly bob with a deep side part | Classic curls | 8–10 weeks | Instant diagonal volume |
| 19. Face-framing bob with lighter pieces | Medium curls | 8–10 weeks | Light-catching colour |
| 20. Diffused curly bob, air-dry first | Classic curls | 8–10 weeks | Wash-and-go routines |
Short and stacked
Short curly bobs earn their keep by removing the weight that drags curls down — and stacked, graduated shapes do it with the most precision. These five keep the length compact while the cutting does the lifting.
1. Stacked curly bob

The stacked curly bob works because graduation puts weight exactly where curls bounce best. The nape is cut shortest — about 5–7 cm dry — and each layer lengthens as it moves forward, reaching 12–15 cm at the jaw, stacked at roughly a 45-degree angle. The mechanism is simple: curls at the crown and back have the most natural lift, so concentrating the shortest layers there lets the spring do the work instead of fighting gravity with product. On classic curls this creates a rounded wedge that lifts the whole face; the front pieces, left longer, frame the jaw instead of puffing beside it. It is cut curl by curl, dry, so every layer lands where that specific curl lives — never combed straight and chopped, which is how stacked cuts turn into ledges on curly hair.
- Length: 5–7 cm at the nape, 12–15 cm at the jaw (dry)
- Curl type: Classic curls (defined spirals)
- Trims: Every 8–10 weeks to keep the stack crisp
- Styling time: 10–15 minutes with a diffuser
Ask your stylist for: “A graduated curly bob cut dry, curl by curl — shortest at the nape at about 6 cm, stacking up to jaw length at the front. Please follow my natural curl clumps and don’t use thinning shears.”
How to style it:
- On soaking-wet hair, rake a golf-ball amount of curl cream through in sections, then scrunch each section upward 4–5 times to reform the clumps.
- Diffuse on medium heat, low speed: cup each section into the bowl for 20–30 seconds, starting at the nape where the stack needs the most lift.
- Once fully dry, shake gently at the roots with your fingertips — never a brush — and smooth one pea-size drop of oil over the surface to kill frizz.
Skip it if your curls are very loose waves — the graduation needs real spring to hold the wedge shape, and waves will read as a dated stacked cut rather than a curly bob.
Best for: Classic curls that go flat at the crown but puff at the ends; oval, heart and long faces that benefit from width at the cheekbones.
2. Short curly bob above the jaw

Cutting above the jaw works on curls for one reason: shorter hair is lighter hair, and lighter curls spring harder. At 8–10 cm dry all round, this bob removes the length that was pulling your spirals into loose waves, so the curls cluster into defined ringlets instead of separating into frizz. The perimeter sits just above the jawline, which keeps the width high on the face — flattering past 50, when a longer bob can drag the eye downward. Because there is so little length, the cut lives or dies on the dry-cutting: each curl is trimmed in its sprung state so the perimeter reads even when every curl is a different length wet.
- Length: 8–10 cm dry, just above the jaw
- Curl type: Classic curls
- Trims: Every 6–8 weeks — short curls lose shape fast
- Styling time: 8–12 minutes
Ask your stylist for: “A short curly bob cut completely dry, about 9 cm all round, sitting just above my jaw. Trim each curl where it lives — I don’t want it evened up wet.”
How to style it:
- Apply leave-in conditioner to dripping-wet hair, then scrunch in a walnut-size amount of gel — gel gives short curls the hold that cream alone can’t at this length.
- Either diffuse for 8 minutes on low heat or air-dry; once bone dry, scrunch out the gel cast with an oiled palm to leave soft, defined clusters.
Skip it if you hate frequent trims — at this length the shape grows out in 6 weeks, and stretched-out short curls quickly turn into a shapeless puff.
Best for: Strong classic curls with good spring; anyone who wants maximum curl definition with minimum morning effort.
3. Rounded curly bob

The rounded bob solves the specific problem of loose-to-medium curls: they don’t have enough spring to hold a sharp shape, so a geometric cut collapses on them by midday. The answer is a halo — a softly rounded silhouette, chin-length at about 12–14 cm dry, with long internal layers that distribute volume evenly around the head instead of stacking it at the corners. The mechanism is weight distribution: because the layers are long and the perimeter is full, no single section carries enough weight to pull the wave pattern straight, and the round outline makes the curls look deliberate rather than accidental. It is the most forgiving shape on this list for curl patterns that sit between wavy and curly.
- Length: 12–14 cm dry, chin-length
- Curl type: Loose waves to medium curls
- Trims: Every 8–10 weeks
- Styling time: 10 minutes, air-dry friendly
Ask your stylist for: “A rounded curly bob, chin-length, cut dry — soft long layers through the interior, full perimeter, and a round silhouette all the way around. My waves need shape, not sharpness.”
How to style it:
- Work a lightweight mousse (two golf balls) through damp hair from mid-lengths to ends — mousse gives loose waves grip without the weight of cream.
- Twist 6–8 random sections loosely around your finger to encourage the wave pattern, then let them fall.
- Air-dry completely — about an hour — or diffuse just the roots for 5 minutes if you want a little lift.
- Break up the cast by shaking your head upside down once; smooth flyaways with a pea-size amount of serum.
Skip it if your curls are tight coils — the round silhouette plus high shrinkage will give you a sphere, and you need the precision of a curl-by-curl cut instead.
Best for: Loose-to-medium curls that fall flat in geometric cuts; long or narrow faces that suit width at the sides.
4. Curly pixie bob (bixie)

The bixie is the shortest bob on this list and the one where shrinkage maths matters most. The back and sides sit at 3–5 cm, the top at 7–10 cm of coils — and because tight coils shrink 40–60%, those numbers are measured dry, on sprung coils, full stop. The mechanism: coils have the most spring of any curl type, so even a few centimetres of length produce real, visible curl formation on top, while the short nape and sides keep the neckline crisp and the head shape clean. It reads as a bob rather than a pixie because the top is genuinely long enough to curl and move. Cut it wet and stretched and you will take off twice what you meant to — this is the cut the good-to-know box later in this guide is warning you about.
- Length: 3–5 cm sides/nape, 7–10 cm top (all dry)
- Curl type: Tight coils
- Trims: Every 5–7 weeks
- Styling time: 5–8 minutes
Ask your stylist for: “A curly bixie cut completely dry on my coils — 4 cm at the sides and nape, 8 cm on top. Cut each coil where it springs, and show me the length dry before you finish.”
How to style it:
- On damp hair, smooth a leave-in through in sections, then apply a curl-defining cream coil by coil on the top — this is the one length where finger-coiling is fast enough to do daily.
- Diffuse the top for 5 minutes on low heat, or air-dry; the short sides need nothing at all.
- Pick the roots gently with an afro pick for lift, then press a drop of oil onto the surface coils for shine.
Skip it if your curls are loose waves — without tight spring, the short back will lie flat and the “bixie” becomes just a short haircut with no curl payoff.
Best for: Tight coils that want the shortest possible bob; strong jawlines and high cheekbones that carry short lengths well.
5. Asymmetric curly bob

Symmetry is the enemy of curly bobs — identical curls on both sides read as a helmet, especially past 50. The asymmetric bob breaks it with a single deliberate move: one side 2–3 cm longer than the other, usually 12 cm on the short side and 14–15 cm on the long side, dry. The mechanism is directional: the longer side draws the eye diagonally down, which slims a round face and stops the silhouette from widening at the jaw. The diagonal also gives the curls somewhere to go — instead of stacking evenly at one level, they cascade, which reads as movement rather than bulk. Keep the difference subtle; more than 3 cm and it stops looking like a bob and starts looking like a growing-out pixie.
- Length: 12 cm short side, 14–15 cm long side (dry)
- Curl type: Classic curls
- Trims: Every 8–10 weeks
- Styling time: 10–12 minutes
Ask your stylist for: “A chin-length curly bob, cut dry, with one side about 2–3 cm longer than the other. Keep it subtle — I want a diagonal line, not a statement.”
How to style it:
- Part your hair on the shorter side while wet, so the longer side falls across — the part placement sells the asymmetry.
- Scrunch curl cream through, diffuse or air-dry, and let the longer side do the talking; tuck the short side loosely behind one ear if you like.
Skip it if you wear your hair dead-centre parted and never change it — the asymmetry needs an off-centre part to make sense, and fighting it daily gets old.
Best for: Round and square faces that benefit from a diagonal line; classic curls with enough density to hold two different lengths convincingly.
Classic chin-to-jaw shapes
This is the heartland of the curly bob — the chin-to-jaw lengths that suit the widest range of curl types. If you only try one section of this guide, make it this one.
6. Classic chin-length curly bob

This is the reference shape everything else is measured against, and it earns that status by suiting the most curls with the fewest conditions. The perimeter sits at 12–14 cm dry, right at the chin, with soft layers through the interior that start at the cheekbones — high enough to lift, long enough not to frizz. The mechanism is balance: at chin length, classic curls have enough weight to hang into defined spirals but not enough to pull themselves straight, and the cheekbone layers keep the crown from going flat while the ends stay full. Cut dry, curl by curl, it is the most predictable curly haircut in existence — what you see in the salon chair is what you get at home, because there is no wet-stretching to lie to you.
- Length: 12–14 cm dry, chin-length
- Curl type: Classic curls
- Trims: Every 8–10 weeks
- Styling time: 10 minutes
Ask your stylist for: “A classic chin-length curly bob, cut dry — 13 cm at the perimeter, soft layers starting at my cheekbones, shaped curl by curl. Nothing blunt, nothing thinned.”
How to style it:
- Scrunch a golf-ball of curl cream into soaking-wet hair, then glaze a walnut-size amount of gel over the top for hold.
- Work in 4 sections, scrunching each separately so the interior curls get product too — flat spots start where product never reached.
- Diffuse for 10 minutes or air-dry; scrunch out any crunch once fully dry.
- Lift the roots gently with an afro pick for all-over volume, then smooth the surface with oiled palms.
Skip it if your curls are very fine and sparse — at chin length with soft layers, low-density curls can look thin at the perimeter, and the blunt-base bob (#7) will serve you better.
Best for: The widest range of classic curls; the default choice if you are new to curly bobs and want the safest, most predictable result.
7. Curly bob with a blunt base

Loose waves have a density problem: the curl pattern is too relaxed to create visual thickness on its own, so layered cuts make the ends look wispy. The blunt base fixes it with a single strong line — the perimeter is cut straight across at 13–15 cm dry, with only the lightest long layers through the interior. The mechanism is a shelf: the blunt edge gives the waves something solid to sit on, so light catches a clean line instead of disappearing into tapered ends, and the hair reads twice as thick as it is. This is the curly bob for women who have always been told their hair is “not curly enough” for curly cuts — it works with the wave you have instead of demanding curl you don’t.
- Length: 13–15 cm dry, one-length perimeter
- Curl type: Loose waves to medium curls
- Trims: Every 8–10 weeks to keep the line clean
- Styling time: 10 minutes
Ask your stylist for: “A curly bob with a blunt, one-length base at about 14 cm dry — cut it dry so the line is true. Only the lightest long layers inside; I want the ends to look thick.”
How to style it:
- Apply volumising mousse (two golf balls) to damp roots and a light cream to the ends — volume at the top, weight at the bottom is the whole game here.
- Diffuse upside down for 8–10 minutes to build root lift, letting the blunt ends fall into their natural wave.
- Once dry, pinch the very ends with a tiny amount of pomade to piece them slightly — a perfectly smooth blunt edge can look severe on waves, and 30 seconds of piecing softens it.
Skip it if your curls are dense and tight — a blunt perimeter on high-density coils creates a shelf of bulk at the jaw with no graduation to release it, which is exactly the triangle in disguise.
Best for: Loose waves and fine-to-medium curls that look thin at the ends; straight-across jawlines that suit a strong horizontal line.
8. Layered curly bob for volume

Fine-density curls have the opposite problem to most curly hair: not too much bulk, but too little lift — the curls lie close to the head and the style reads flat by noon. The fix is interior layering with intent: layers cut at 8–12 cm through the crown, dry, so the top curls are physically shorter and therefore springier than the perimeter. The mechanism is differential spring — shorter curls bounce higher, which stacks the top curls upward and creates volume where fine curls go limp, while the 13–15 cm perimeter keeps the ends from looking sparse. The critical detail: the layers must follow the curl clumps, never be cut straight across, or fine curls separate into stringy pieces instead of stacking into a unified shape.
- Length: 8–12 cm crown layers, 13–15 cm perimeter (dry)
- Curl type: Classic curls, finer density
- Trims: Every 8–10 weeks
- Styling time: 12–15 minutes with a diffuser
Ask your stylist for: “A layered curly bob for fine-density curls, cut dry — short crown layers around 10 cm to build volume on top, perimeter at 14 cm. Layer within my curl clumps, not across them.”
How to style it:
- Flip your head upside down and scrunch a lightweight foam through soaking-wet hair — foam gives fine curls hold without the heaviness of cream.
- Diffuse upside down on medium heat for 10 minutes, hovering at the roots first to set the lift before touching the lengths.
- Flip upright, arrange the part with your fingers, and mist the crown lightly with a flexible-hold spray — never a heavy hairspray, which collapses fine curls.
- Refresh on day two by spritzing the crown with water and scrunching — the short layers re-spring faster than the lengths, which is exactly what you want.
Skip it if your curls are coarse and dense — this much interior layering on thick curls creates a halo of frizz and a shape that grows outward instead of up.
Best for: Fine-density classic curls that fall flat; anyone whose curls look good on wash day and limp by day two.
9. Curly A-line bob
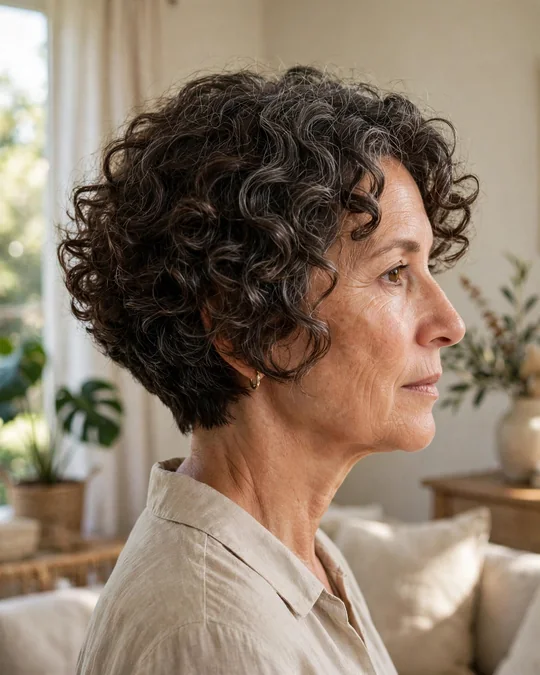
The A-line is the most face-flattering geometry in the bob family, and curls only improve it. The back sits at 10–12 cm dry while the front pieces reach 15–18 cm, creating a clean forward diagonal. The mechanism is elongation: the longer front pulls the eye down and forward along the jawline, which lengthens the neck visually and narrows a round or wide face — and because the length difference is in the perimeter rather than the layers, the curls keep their integrity instead of being carved up. On classic curls the diagonal also solves a practical problem: front curls are usually the loosest (years of tucking behind ears trains them), so giving them extra length lets them hang into proper spirals instead of springing up short beside the chin.
- Length: 10–12 cm back, 15–18 cm front (dry)
- Curl type: Classic curls
- Trims: Every 8–10 weeks
- Styling time: 10–12 minutes
Ask your stylist for: “A curly A-line bob cut dry — shorter at the back around 11 cm, angling down to 16 cm at the front. Keep the layers soft so the diagonal reads clean.”
How to style it:
- Style with a side part while wet — the A-line needs the part off-centre to show the diagonal properly.
- Scrunch cream and gel through, diffuse or air-dry, then check the line in the mirror: the front should fall visibly longer than the back on both sides.
Skip it if your curls shrink more than 30% — on tight coils the length difference disappears when dry and you have paid for geometry you can’t see.
Best for: Round, square and wide faces; classic curls whose front sections are looser than the back.
10. Shaggy curly bob

The shag is controlled chaos, and on loose waves it is the difference between “bedhead” and “deliberate”. Choppy, point-cut layers run through the whole head — shortest pieces around 8 cm at the crown, perimeter at 12–14 cm dry — breaking the wave clumps so they move as separate pieces instead of one solid curtain. The mechanism is fragmentation: point-cutting (snipping into the ends vertically rather than straight across) lets each wave find its own length, which creates the piece-y, rock-and-roll texture that makes this cut look expensive rather than undone. It is the highest-maintenance-looking cut on this list that is actually among the lowest-maintenance — the messier it gets, the better it looks.
- Length: 8 cm crown pieces, 12–14 cm perimeter (dry)
- Curl type: Loose waves
- Trims: Every 10–12 weeks — shags grow out gracefully
- Styling time: 8–10 minutes
Ask your stylist for: “A shaggy curly bob, cut dry — choppy point-cut layers throughout, shortest at the crown around 8 cm, perimeter at 13 cm. I want piece-y separation, not a solid shape.”
How to style it:
- Work a salt spray or texturising foam through damp hair — the shag wants grit, not slip.
- Scrunch hard and diffuse on high heat, low speed for 8 minutes, lifting sections at the crown as you go.
- Finish by twisting 4–5 random pieces around your finger with a dab of wax — deliberate piece-iness is what separates this from actual bedhead.
Skip it if you need a polished, office-neat look every day — the shag’s whole point is texture, and it will not sit in a sleek corporate shape no matter what you do to it.
Best for: Loose waves that look boring in tidy cuts; anyone who wants the lowest-effort “styled” hair on this list.
Good to know
Never let anyone cut your curly bob wet and stretched. A stylist who combs your curls straight, cuts to the “right” length, and lets them spring back has just removed 3–5 cm more than you agreed to — on tight coils, far more. The test is simple: if the scissors come out before your hair is fully dry and in its natural curl pattern, stop the haircut. A dry cut takes 15–20 minutes longer and is the entire difference between a bob you love and one you hide under a scarf for three months.
Lobs and longer bobs
Longer bobs are the diplomatic option: all the shape of a bob with the safety net of length. These five suit anyone easing into short hair — or anyone whose curls need length to behave.
11. Curly lob to the collarbone

The lob is the safest first curly bob because it hedges every risk at once. At 18–22 cm dry, reaching the collarbone, there is enough length that even a misjudged layer disappears into the whole — and enough weight that classic curls hang into long, defined spirals instead of springing into a triangle. The mechanism is gravity-assisted definition: the extra 5–8 cm over a chin-length bob pulls each curl just taut enough to elongate the spiral, which reads as sleek rather than voluminous. Long layers start at the chin to keep the bottom from going bulky, and the whole thing is cut dry so the collarbone landing point is real, not a wet-cut promise that springs up to the jaw.
- Length: 18–22 cm dry, collarbone
- Curl type: Classic curls
- Trims: Every 10–12 weeks
- Styling time: 12–15 minutes
Ask your stylist for: “A curly lob to the collarbone, cut dry — 20 cm at the perimeter, long layers starting at my chin. I want it to land on my collarbone when it’s fully dry, not when it’s wet.”
How to style it:
- Apply leave-in to soaking-wet hair in 4 sections, smoothing each section downward first to encourage length, then scrunching upward to reform the curl.
- Smooth a quarter-size amount of gel over the canopy — the top layer is what frizzes first on longer bobs.
- Diffuse in sections for 12 minutes, or plop in a cotton T-shirt for 20 minutes then air-dry — plopping works brilliantly at this length because there’s enough hair to hold the shape.
- When dry, lift the roots with your fingers and let the lengths fall; a light oil on the very ends keeps them from looking dry.
Skip it if your curls are very tight coils — at 20 cm, coils carry serious weight and the lob can pull into a long, heavy shape that loses the bob silhouette entirely.
Best for: First-time curly bobs; classic curls that need length to elongate; anyone nervous about going short.
12. Grown-out curly bob

Most curly bobs are cut for day one and fall apart by week ten. The grown-out bob is cut for month three: the layers are placed so the shape stays balanced as every curl lengthens at its own rate. The mechanism is planned weight migration — the stylist leaves the interior slightly fuller than a fresh cut needs, knowing the perimeter will gain weight as it grows, so the two meet in the middle instead of the ends going bulky while the top goes flat. It starts at 14–16 cm dry and is designed to look right at 18–20 cm. The trade-off is honesty: it will never look as crisp as a freshly cut bob, but it will look good for twice as long, which for many women is the better deal.
- Length: 14–16 cm dry, designed to grow to 18–20 cm
- Curl type: Classic curls
- Trims: Every 12–14 weeks
- Styling time: 10 minutes
Ask your stylist for: “A curly bob cut to grow out well — 15 cm dry now, with the layers placed so it still looks balanced at 19 cm. Leave the interior a touch fuller than usual; I want 3 good months, not 3 good weeks.”
How to style it:
- Style as normal with cream and gel, but once a week do a proper deep-condition — longer grow-outs expose older, drier ends that need the extra moisture.
- At week 8, dust the very ends yourself (2–3 mm, dry, curl by curl) to keep the perimeter clean without a salon visit.
Skip it if you love the crisp, just-cut look — this cut is engineered for the long game, and its fresh-out-of-the-chair sharpness is deliberately softer.
Best for: Low-salon-commitment routines; classic curls that grow evenly; anyone who stretches trims to twice a year.
13. Wavy bob for loose curls

Barely-curly hair is the hardest to cut well because most curly techniques assume spring you don’t have. This bob is built for loose waves specifically: a 13–15 cm dry perimeter with long layers that start below the chin, so the wave pattern is encouraged rather than forced. The mechanism is wave preservation — short layers would chop your S-bends into pieces that fall straight, so the layers stay long and the shape comes from the perimeter line and a deep side part instead. The result reads as an expensive wavy bob rather than a failed curly one, which is exactly the point: it works with 2A–2C hair instead of pretending it’s 3A.
- Length: 13–15 cm dry
- Curl type: Loose waves
- Trims: Every 8–10 weeks
- Styling time: 10 minutes
Ask your stylist for: “A wavy bob at 14 cm dry for loose waves — long layers starting below my chin, clean perimeter, deep side part. Don’t layer it like curly hair; my waves need length to hold their pattern.”
How to style it:
- Scrunch a wave-enhancing foam through damp hair — waves need encouragement, and foam gives it without weight.
- Braid two loose plaits while damp and leave for 30 minutes (or overnight) to set the S-pattern, then undo.
- Diffuse the roots for 5 minutes for lift, shake out, and finish with a dry texture spray on the mid-lengths for grip.
Skip it if your hair is stick-straight with a single bend at the ends — that’s not loose-wave hair, and this cut will just look like an ordinary bob on you (which is fine, but not what this guide is for).
Best for: Genuine loose waves (2A–2C); anyone told their hair is “not curly enough” for curly cuts.
14. Tight-coil bob, shaped close

This is the most technical cut on the list and the one where the stylist matters more than the style. Each coil is cut individually in its dry, sprung state — the stylist lifts a coil, sees where it naturally falls, and trims it there, working around the whole head at 10–14 cm dry. The mechanism is coil-by-coil architecture: because tight coils shrink up to 60% and each one springs differently, no uniform layering system can predict the shape — only cutting what you see, dry, produces an even silhouette. It takes 45–60 minutes of cutting time (twice a standard bob) and it is worth every minute: this is how you get a bob on coily hair that is genuinely even rather than hopefully even.
- Length: 10–14 cm dry, coil by coil
- Curl type: Tight coils
- Trims: Every 6–8 weeks
- Styling time: 15–20 minutes
Ask your stylist for: “A coil-by-coil dry cut at 12 cm — I want every coil cut in its natural sprung state, no stretching, no combs pulling it straight. Take the full appointment time; I’d rather wait than have it rushed.”
How to style it:
- Section damp hair into 8 twists, apply leave-in and cream to each, then undo and separate the coils with oiled fingers for definition.
- Diffuse on low heat or hooded-dry for 15 minutes; air-drying works but takes over 2 hours at this density.
Skip it if your stylist won’t commit to a full dry-cutting appointment — a rushed or wet-cut version of this is the single fastest route to an uneven bob on coily hair.
Best for: Tight coils that want a true, even bob silhouette; anyone willing to invest in the right stylist and the right appointment length.
15. Silver curly bob

Grey curls are a different fibre: coarser, drier, and more resistant to product than pigmented hair, with a texture that can frizz before you’ve left the bathroom. The silver curly bob is cut to flatter that fibre — 13–16 cm dry, weight kept deliberately at the ends so the coarser curls have something to hang from, and the canopy shaped to catch light. The mechanism is gloss engineering: silver hair reflects light beautifully when the cuticle lies flat, so the shape avoids over-layering (which roughs the cuticle up) and the routine leans on moisture and purple shampoo every 2–3 weeks to keep the tone bright rather than yellow. The result is grey worn as the feature, not the apology.
- Length: 13–16 cm dry
- Curl type: Medium curls, natural grey/silver
- Trims: Every 8–10 weeks
- Styling time: 12 minutes
Ask your stylist for: “A silver curly bob at 14 cm dry — keep the weight at the ends, minimal layering, shaped to catch the light. My grey is coarser than my old colour was, so cut for the texture I have now.”
How to style it:
- Start with a hydrating leave-in — grey curls drink moisture, and dry grey frizzes faster than pigmented hair.
- Scrunch in curl cream, then a pea-size of shine serum over the canopy while still damp; the serum is what makes silver read as glossy rather than dull.
- Diffuse or air-dry; once dry, use purple shampoo every second or third wash (2 minutes of contact time) to neutralise yellowing.
- Sleep on a satin pillowcase — cotton roughs up the coarser grey cuticle overnight and you’ll feel the difference by morning.
Skip it if you colour your grey away — this cut’s whole design assumes the coarser, drier fibre of natural silver, and the weight distribution is wrong for softer pigmented curls.
Best for: Natural silver and grey curls; anyone growing out colour who wants the grey to look intentional from day one.
Fringes, parts and finishes
The last five aren’t really separate haircuts — they’re the finishing decisions that transform any bob on this list. A fringe, a part change or a colour placement can remake a cut you already have.
16. Curly bob with a curly fringe

A curly fringe terrifies people because they’ve seen it cut like a straight fringe — short, wet, and disastrous when it springs up. Done right, it’s cut long and dry: 8–10 cm at the brow in its natural curl, which springs to 5–7 cm and sits soft against the forehead. The mechanism is controlled shrinkage — the stylist cuts the fringe in its dry curl pattern and leaves it a full 3 cm longer than the target, knowing exactly how far each curl will lift. Worn soft and piece-y rather than pressed flat, it shortens a long forehead and brings the eyes forward, and on classic curls it integrates with the rest of the bob instead of sitting on it like an afterthought.
- Length: Bob 12–14 cm; fringe 8–10 cm cut, 5–7 cm worn (dry)
- Curl type: Classic curls
- Trims: Fringe every 6–8 weeks, bob every 8–10
- Styling time: 12 minutes
Ask your stylist for: “A curly fringe cut dry and long — 9 cm at the brow in my natural curl, worn soft and piece-y. Cut it longer than you think; I want it to land at my brows dry, not above them.”
How to style it:
- Style the fringe first, while it’s wettest — apply a dab of cream and coil 3–4 pieces around your finger in the direction you want them to fall.
- Diffuse the fringe on low heat for 2–3 minutes, directing it forward and down; never brush it, which turns curl fringe into a frizz halo.
- Once dry, separate the coils with your fingertips for softness — the fringe should look touchable, not shellacked.
Skip it if your curls are very tight coils with 50%+ shrinkage — the fringe becomes unpredictable day to day, and curtain bangs (#17) give you the framing with far less drama.
Best for: Long foreheads; classic curls with reliable, even spring; anyone who wants the fringe without the flat-iron.
17. Curly bob with curtain bangs

Curtain bangs are the low-commitment fringe: centre-parted, 10–14 cm dry, sweeping to each side and melting into the bob’s front layers. The mechanism is framing without coverage — because the bangs part in the middle and angle outward, they soften the face around the cheekbones and temples without ever sitting on the forehead, which means no daily styling battle and a grow-out so graceful you’ll barely notice it. On loose-to-medium curls they blend seamlessly; the bang curls just become the front of the bob. It is the fringe for women who have sworn off fringes.
- Length: Bangs 10–14 cm dry; bob 12–15 cm
- Curl type: Loose waves to medium curls
- Trims: Every 8–10 weeks with the bob
- Styling time: 10 minutes
Ask your stylist for: “Curtain bangs on my curly bob, cut dry — centre-parted, 12 cm, blending into the front layers. I want framing, not a fringe.”
How to style it:
- Create the centre part while wet, smooth cream through the bang sections, and direct each side outward away from the face as it dries.
- Diffuse or air-dry; the outward direction is the whole trick — if the bangs fall forward they become a fringe, so keep coaxing them sideways until set.
Skip it if you never wear a centre part — curtain bangs need that middle split to work, and forcing one against a lifelong side part is a daily fight.
Best for: Wide cheekbones and round faces; loose-to-medium curls; fringe sceptics.
18. Curly bob with a deep side part

Sometimes the best “haircut” is a part change. Moving the part 5–7 cm off-centre — far over near the temple, not a timid centimetre — throws the entire weight of the bob to one side, and on curls that means instant diagonal volume. The mechanism is redistribution: the heavy side gains dramatic lift at the root because the curls are suddenly stacked against their natural fall, while the light side lies sleek and close. It works on any chin-length curly bob you already own, costs nothing, and takes ten seconds. The only rule: commit to the depth. A shallow side part on curls just looks like a mistake; a deep one looks like a decision.
- Length: Any chin-length curly bob, 12–15 cm
- Curl type: Classic curls
- Trims: As per your bob, 8–10 weeks
- Styling time: Adds 1 minute to your routine
Ask your stylist for: “I want to wear this with a deep side part — can you check the shape works when it’s parted 6 cm off-centre, and take a touch more weight out of the heavy side so it doesn’t go triangular?”
How to style it:
- While hair is soaking wet, comb it all to one side and set the part 5–7 cm off-centre with the tail of a comb — wet-setting trains the root direction.
- Apply product as normal, but diffuse the heavy side with the head tilted so the roots dry lifted away from the scalp.
- Once dry, tuck the light side loosely behind the ear and let the heavy side cascade — the contrast is the style.
- Pin the part with a single bobby pin on day two if it tries to migrate back; after a week of wet-setting, it will hold on its own.
Skip it if your hairline has a strong cowlick exactly where the deep part would sit — fighting a cowlick daily will age you faster than any part is worth.
Best for: Any existing chin-length curly bob that feels flat; oval and oblong faces that suit asymmetric volume.
19. Face-framing curly bob with lighter pieces

Colour is a cutting tool in disguise. On a 13–15 cm curly bob, placing lighter pieces — 2–3 shades above your base — through the top canopy and around the face changes how the shape reads without touching the scissors. The mechanism is light mapping: the eye goes to the brightest curls first, so lightness on the canopy creates the illusion of volume on top (where curls often go flat) while the darker ends recede and look denser. The critical rule for curls: the colour is painted on the surface of the curl clump, never sliced through it, so each ringlet keeps its dark-to-light dimension instead of turning into stripes. Keep it to the top third; lightness at the ends on curly hair reads as damage, not dimension.
- Length: 13–15 cm dry; colour on the top canopy only
- Curl type: Medium curls
- Trims: Every 8–10 weeks; colour refresh 12–16 weeks
- Styling time: 12 minutes
Ask your stylist for: “Face-framing lighter pieces on my curly bob — 2 to 3 shades lighter than my base, painted on the surface of the curls on the top canopy and around my face only. No stripes, no lightened ends.”
How to style it:
- Use a colour-safe, sulphate-free cleanser — lightened curls are drier and the colour fades fast with harsh shampoo.
- Style as normal, but finish by arranging 3–4 of the lightest curls deliberately around your face — they’re the feature now, so show them.
- Gloss with a shine serum on the canopy; light catches the lighter pieces best when the cuticle is smooth.
Skip it if your curls are already fragile or over-processed — lightness costs moisture, and damaged curls plus bleach is how bobs become pixies by accident.
Best for: Medium curls that look one-dimensional; anyone whose bob has the right shape but the wrong flatness of colour.
20. Diffused curly bob, air-dry first

The last entry isn’t a cut — it’s a philosophy, and it might be the most useful one here. The wash-and-go curly bob is cut at 12–15 cm dry with long, even layers and then deliberately left alone: wash, scrunch in product, and either diffuse for 10 minutes or air-dry and walk out. The mechanism is acceptance engineering — the cut is designed so its silhouette holds with zero intervention, which means the layers are long enough not to frizz into chaos and the perimeter is full enough to look finished air-dried. Women who “can’t do curly hair” usually can’t do high-maintenance curly routines; remove the routine and the hair turns out to have been fine all along. This is the bob for real life.
- Length: 12–15 cm dry, long even layers
- Curl type: Classic curls
- Trims: Every 8–10 weeks
- Styling time: 5 minutes hands-on (plus drying time)
Ask your stylist for: “A wash-and-go curly bob at 13 cm dry — long even layers, full perimeter, cut dry. I need it to look finished with no styling beyond product and drying.”
How to style it:
- In the shower, detangle with conditioner and a wide-tooth comb, then rinse and do not touch it with the comb again — ever.
- Scrunch in leave-in and gel, plop in a T-shirt for 15 minutes to remove excess water, then either diffuse 10 minutes or air-dry and go live your life.
Skip it if you need guaranteed polish for work every single day — wash-and-go has beautiful days and “characterful” days, and total predictability isn’t on the menu.
Best for: Anyone who wants curly hair without a curly routine; classic curls with a forgiving, even pattern.
Curly bob care that keeps the shape
A curly bob is a precision instrument — it only stays precise if the curls stay healthy. These are the habits that keep the shape you paid for.
- Wash with a sulphate-free cleanser; harsh shampoo roughs the cuticle and turns defined curls into frizz by day two.
- Detangle only when soaking wet with conditioner in — never dry, never with a fine comb. A wide-tooth comb or your fingers, always.
- Apply stylers to dripping-wet hair. Product on damp-but-not-wet hair sits on the surface; on soaking hair it distributes into every clump.
- Sleep on satin or silk — a pillowcase or a loose pineapple on top of your head. Cotton absorbs moisture and roughs the cuticle overnight.
- Refresh second-day hair with water, not more product. A fine mist and a scrunch reactivates yesterday’s gel; layering fresh product on top creates buildup.
- Clarify once a month. Even curly routines accumulate silicones and butters; a single clarifying wash resets the curl pattern without stripping it.
Your wash-day routine:
- Cleanse with sulphate-free shampoo, focusing on the scalp; let the rinse run through the lengths.
- Condition generously, detangle with fingers or a wide-tooth comb, then rinse about 80% out — leave some slip in.
- On soaking-wet hair: leave-in, then cream, then gel — in that order, scrunching each one in. This is the LOC order that seals moisture under hold.
- Plop 15 minutes in a cotton T-shirt, then diffuse or air-dry. Scrunch out any cast when bone dry, and you’re done for 2–3 days.
The bottom line
If I had to pick one, it would be the classic chin-length curly bob (#6). It’s the only cut here that suits nearly every classic curl pattern with no special conditions — dry-cut, honest about shrinkage, and predictable from the chair to your bathroom mirror. The tight-coil bob shaped close (#14) is the runner-up for coily hair, because nothing else gives coils that kind of precision. Whichever you choose, make the dry cut non-negotiable: it’s the difference between a bob and a gamble.
Found your curl’s match? Pin this guide to your hair board so the stylist wording and shrinkage maths are on your phone when you sit in the chair.
Frequently asked questions
Can older women with curly hair really wear a short bob?
Yes — and curly bobs for older women are often easier than the long hair they’re replacing. Shorter curls spring more, need less product, and dry faster, which solves the three biggest complaints about curly hair past 50. The conditions are simple: the cut must be done dry on your actual curl pattern, the layers must start high enough to prevent the triangle, and the length should respect your shrinkage rate. Meet those three and age is irrelevant; miss them and the cut fails at 30 just as fast as at 60.
How short will my curly bob actually be when it dries?
It depends entirely on your curl type. Measure a shed hair stretched straight, then let it spring back: loose waves lose 5–10% of their length, classic curls 15–25%, and tight coils 40–60%. So a coil cut at 20 cm wet lands around 10–12 cm dry. This is why every length in this guide is given dry — and why you should ask your stylist to show you the length on dry hair before they finish. If they cut it wet and stretched, add the shrinkage back mentally and speak up.
Will a curly bob work if my hair is thinning at the crown?
It can, with the right choice. If the thinning is mild, the layered curly bob for volume (#8) is built for exactly this — short crown layers create lift that disguises sparse areas. If the thinning is significant, avoid cuts that expose the scalp line: the blunt-base bob (#7) keeps the perimeter full, and shorter lengths generally look thicker than longer ones because the eye isn’t comparing sparse ends to a fuller top. Be honest with your stylist about it; a good one will adjust the layering to keep coverage where you need it.
How often does a curly bob need trimming?
Every 8–10 weeks for most lengths on this list. Shorter shapes (the bixie, the above-the-jaw bob) need 5–8 weeks because there’s so little length that growth shows immediately; longer lobs and grown-out cuts stretch to 10–14. The sign it’s time isn’t the calendar — it’s when the perimeter starts sitting unevenly or the shape widens at the bottom instead of holding its silhouette. Curly hair hides growth well, so check the shape in the mirror rather than counting weeks.
Can I get a curly bob with bangs at 60?
Absolutely — the curly fringe (#16) and curtain bangs (#17) were designed for exactly this. The rules: the fringe must be cut dry and long (cut it 3 cm longer than the target to allow for spring), and it needs to suit your curl type — classic curls take a full fringe beautifully, while tight coils do better with curtain bangs that have room to move. A curly fringe also softens forehead lines better than any cream, which is a legitimate bonus. Just budget a fringe trim every 6–8 weeks; bangs are the one part of a curly bob that won’t wait.
What if my curls are different types all over my head?
Almost everyone’s are — tighter at the nape, looser at the crown is the classic pattern. This is precisely why dry, curl-by-curl cutting exists: the stylist treats each section according to the curl that lives there instead of applying one formula. When you book, mention the variation (“my nape is much tighter than my crown”) so they allow extra time. And choose forgiving shapes: the rounded bob (#3) and the classic chin-length (#6) absorb curl variation gracefully, while precision cuts like the blunt base (#7) punish it.
Do I have to diffuse every morning?
No. Diffusing buys you volume and speed, but every cut on this list is designed to survive air-drying — that’s the “would it hold untouched?” test from the how-to-choose section. If you’re an air-dryer, favour the longer shapes (the lob at #11, the grown-out bob at #12, the wash-and-go at #20), which have enough weight to settle gracefully. Second-day hair usually just needs a water mist and a scrunch to reactivate. The only cuts that genuinely prefer the diffuser are the volume-built ones (#1 and #8), where heat sets the lift.